My husband and I have been thinking about a trip to Japan for some time, but things only became “real” once we finally booked our plane tickets in March.
We then began the very long and slow process of learning basic Japanese using Duolingo, an online course, and NativShark. Then things became even more real once I realized, oh wow, this trip is only 2 months away — time to get organized (and actually start booking things)!
With my Lonely Planet Japan guide, recommendations from friends, Reddit, and my google-fu, I began this research project like I would begin any other: with a *Notion dashboard.
We created a project in our main Project database called Japan, where we could attach notes, recommendations, questions, ideas, flight details, etc.
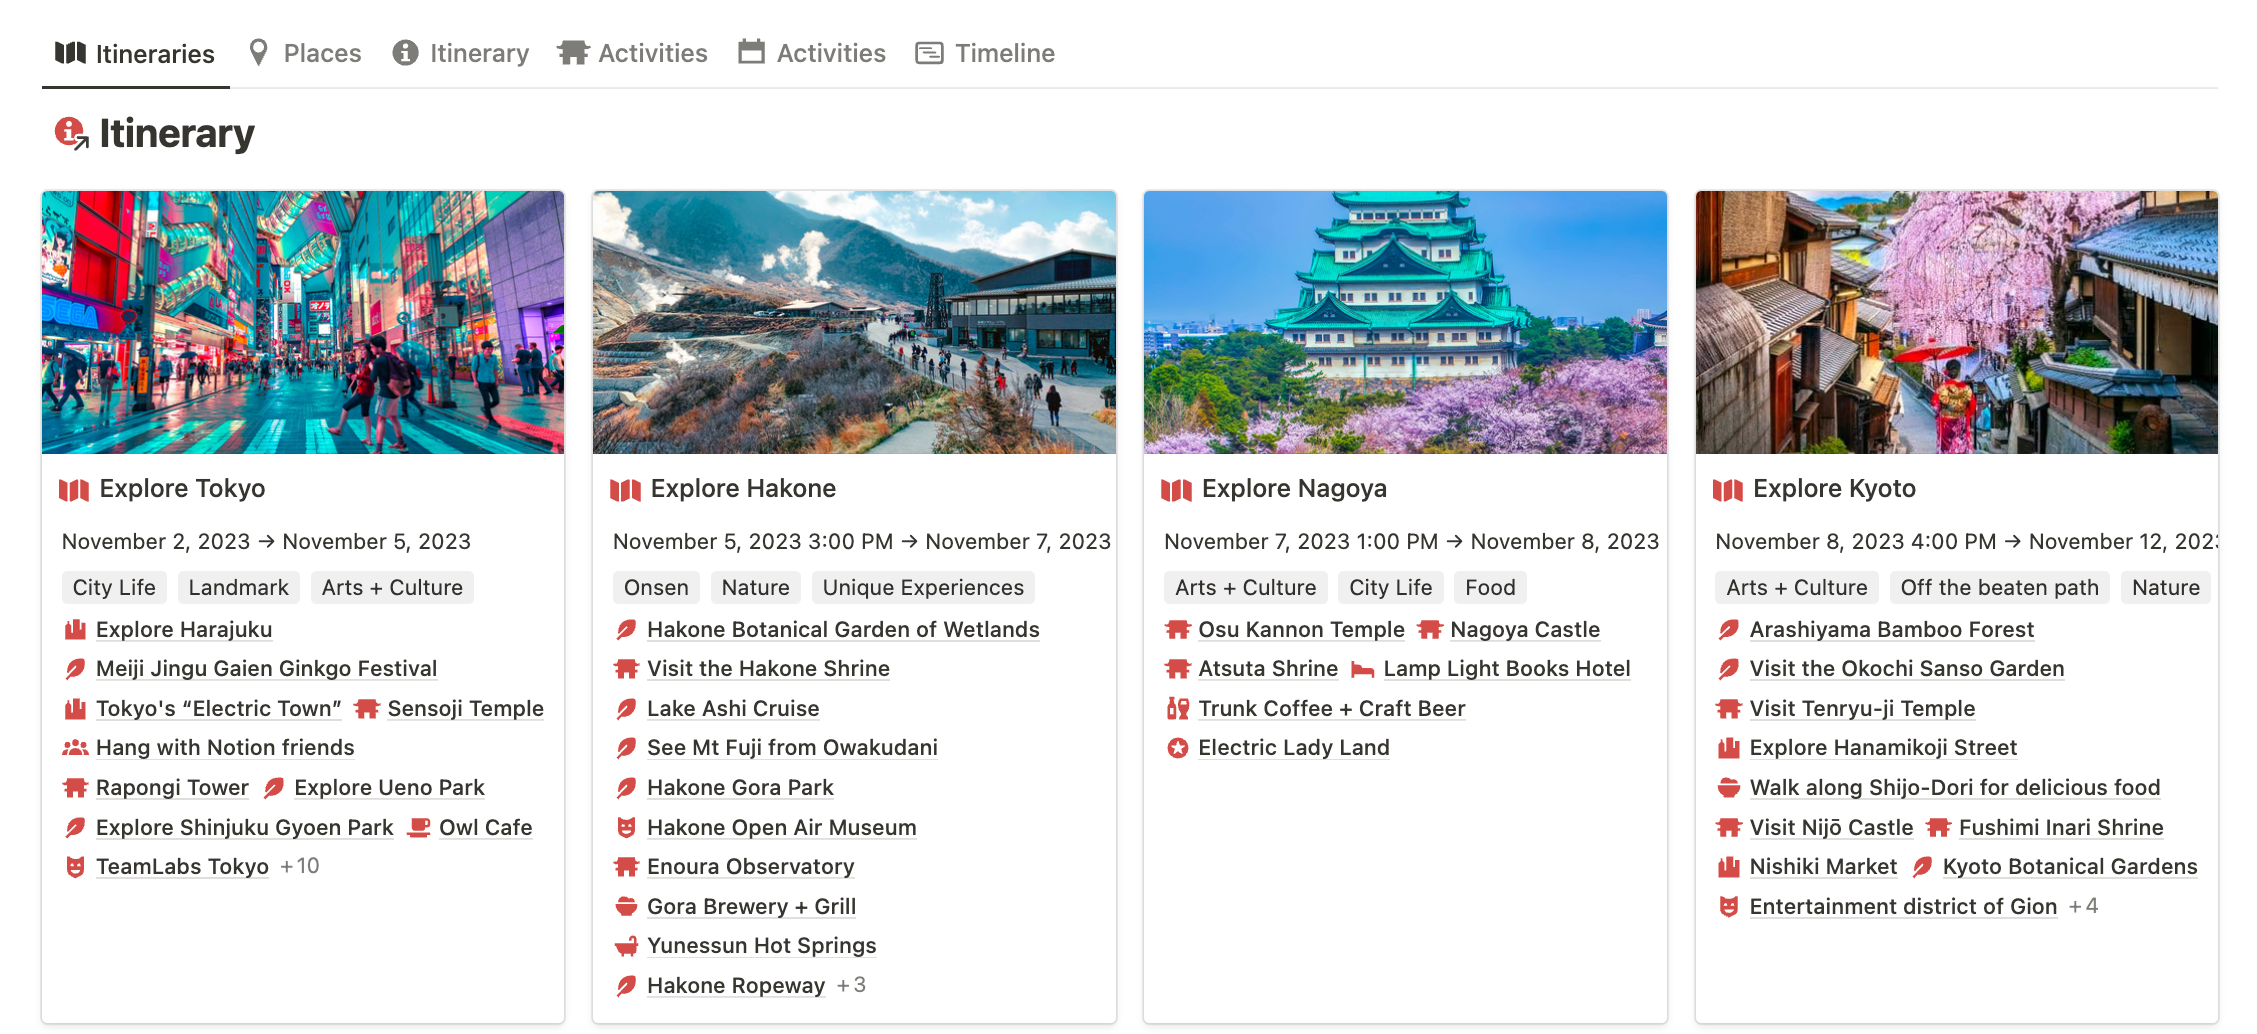
Inside that Project page I created a dashboard called Japan Itinerary where I began consolidating information and notes into a set of stand-alone databases (not connected to any others in my workspace):
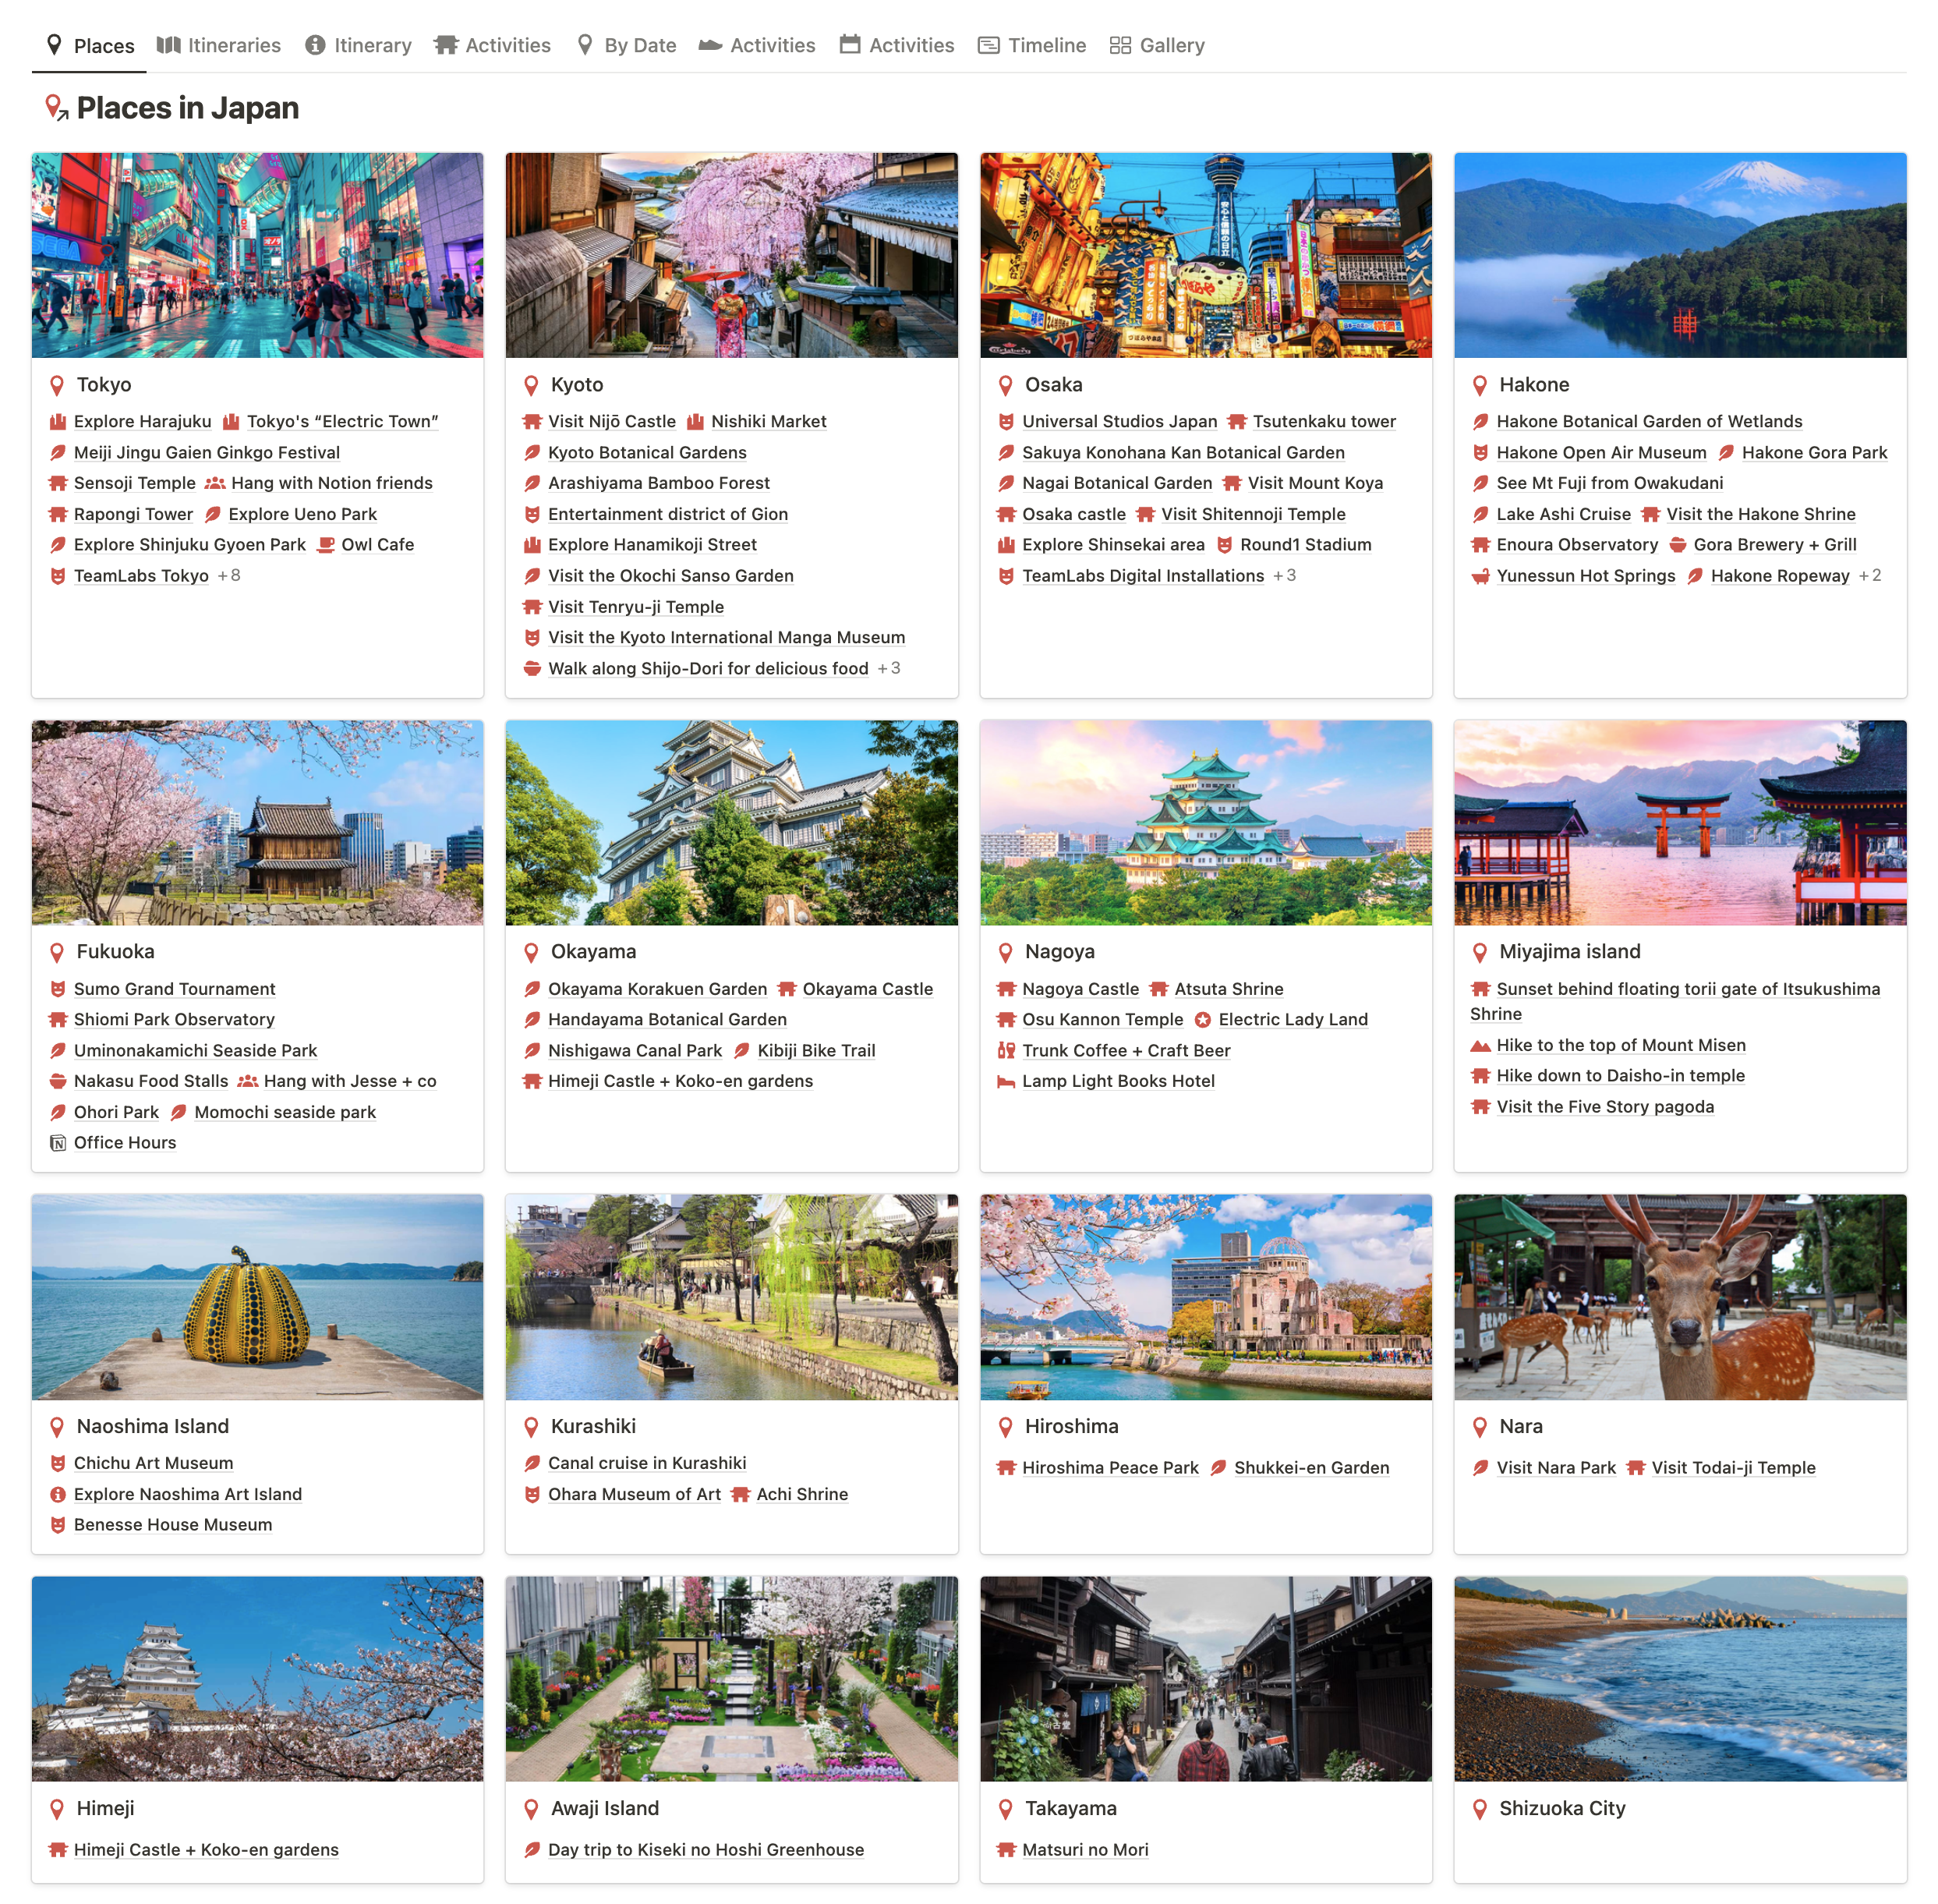
- Places in Japan: the cities and areas we might like to explore
- Activities: sightseeing, entertainment, food, experiences, etc
- Itinerary: groupings of activities based on date and location.
- Categories: The various categories that activities fall within (accommodation, food, entertainment, etc.)
What’s nice about this method is that we can still track project-related tasks (Buy JR Pass, Get international licence, Book tickets for X event, etc) and information easily, while keeping all of the trip-specific stuff clean and separate for when we’re actually traveling.
Plan the key locations
We identified some of the main cities we wanted to see, as well as some of the key activities based on our research.
We like a good mix of “off the beaten path,” arts + culture, food, and experiencing local vibes. With one month of travel, we were pretty confident that we could have elements of both.
Places in Japan
I set up a database of the key areas we wanted to visit. These each had a description, research notes (and links to blog posts), recommended length of stay, etc. We then began identifying sights and activities that city had to offer (relation to the activities database).
I then set up a Google My Maps to begin pinning key locations and recommendations so I could get a better idea of how far apart things are in time and space. It’s tricky to make decisions on accommodations or transportation (JR Pass, public transit, etc) without knowing the rough distances between locations, so having visual waypoints mapped out helps with these kinds of decisions.
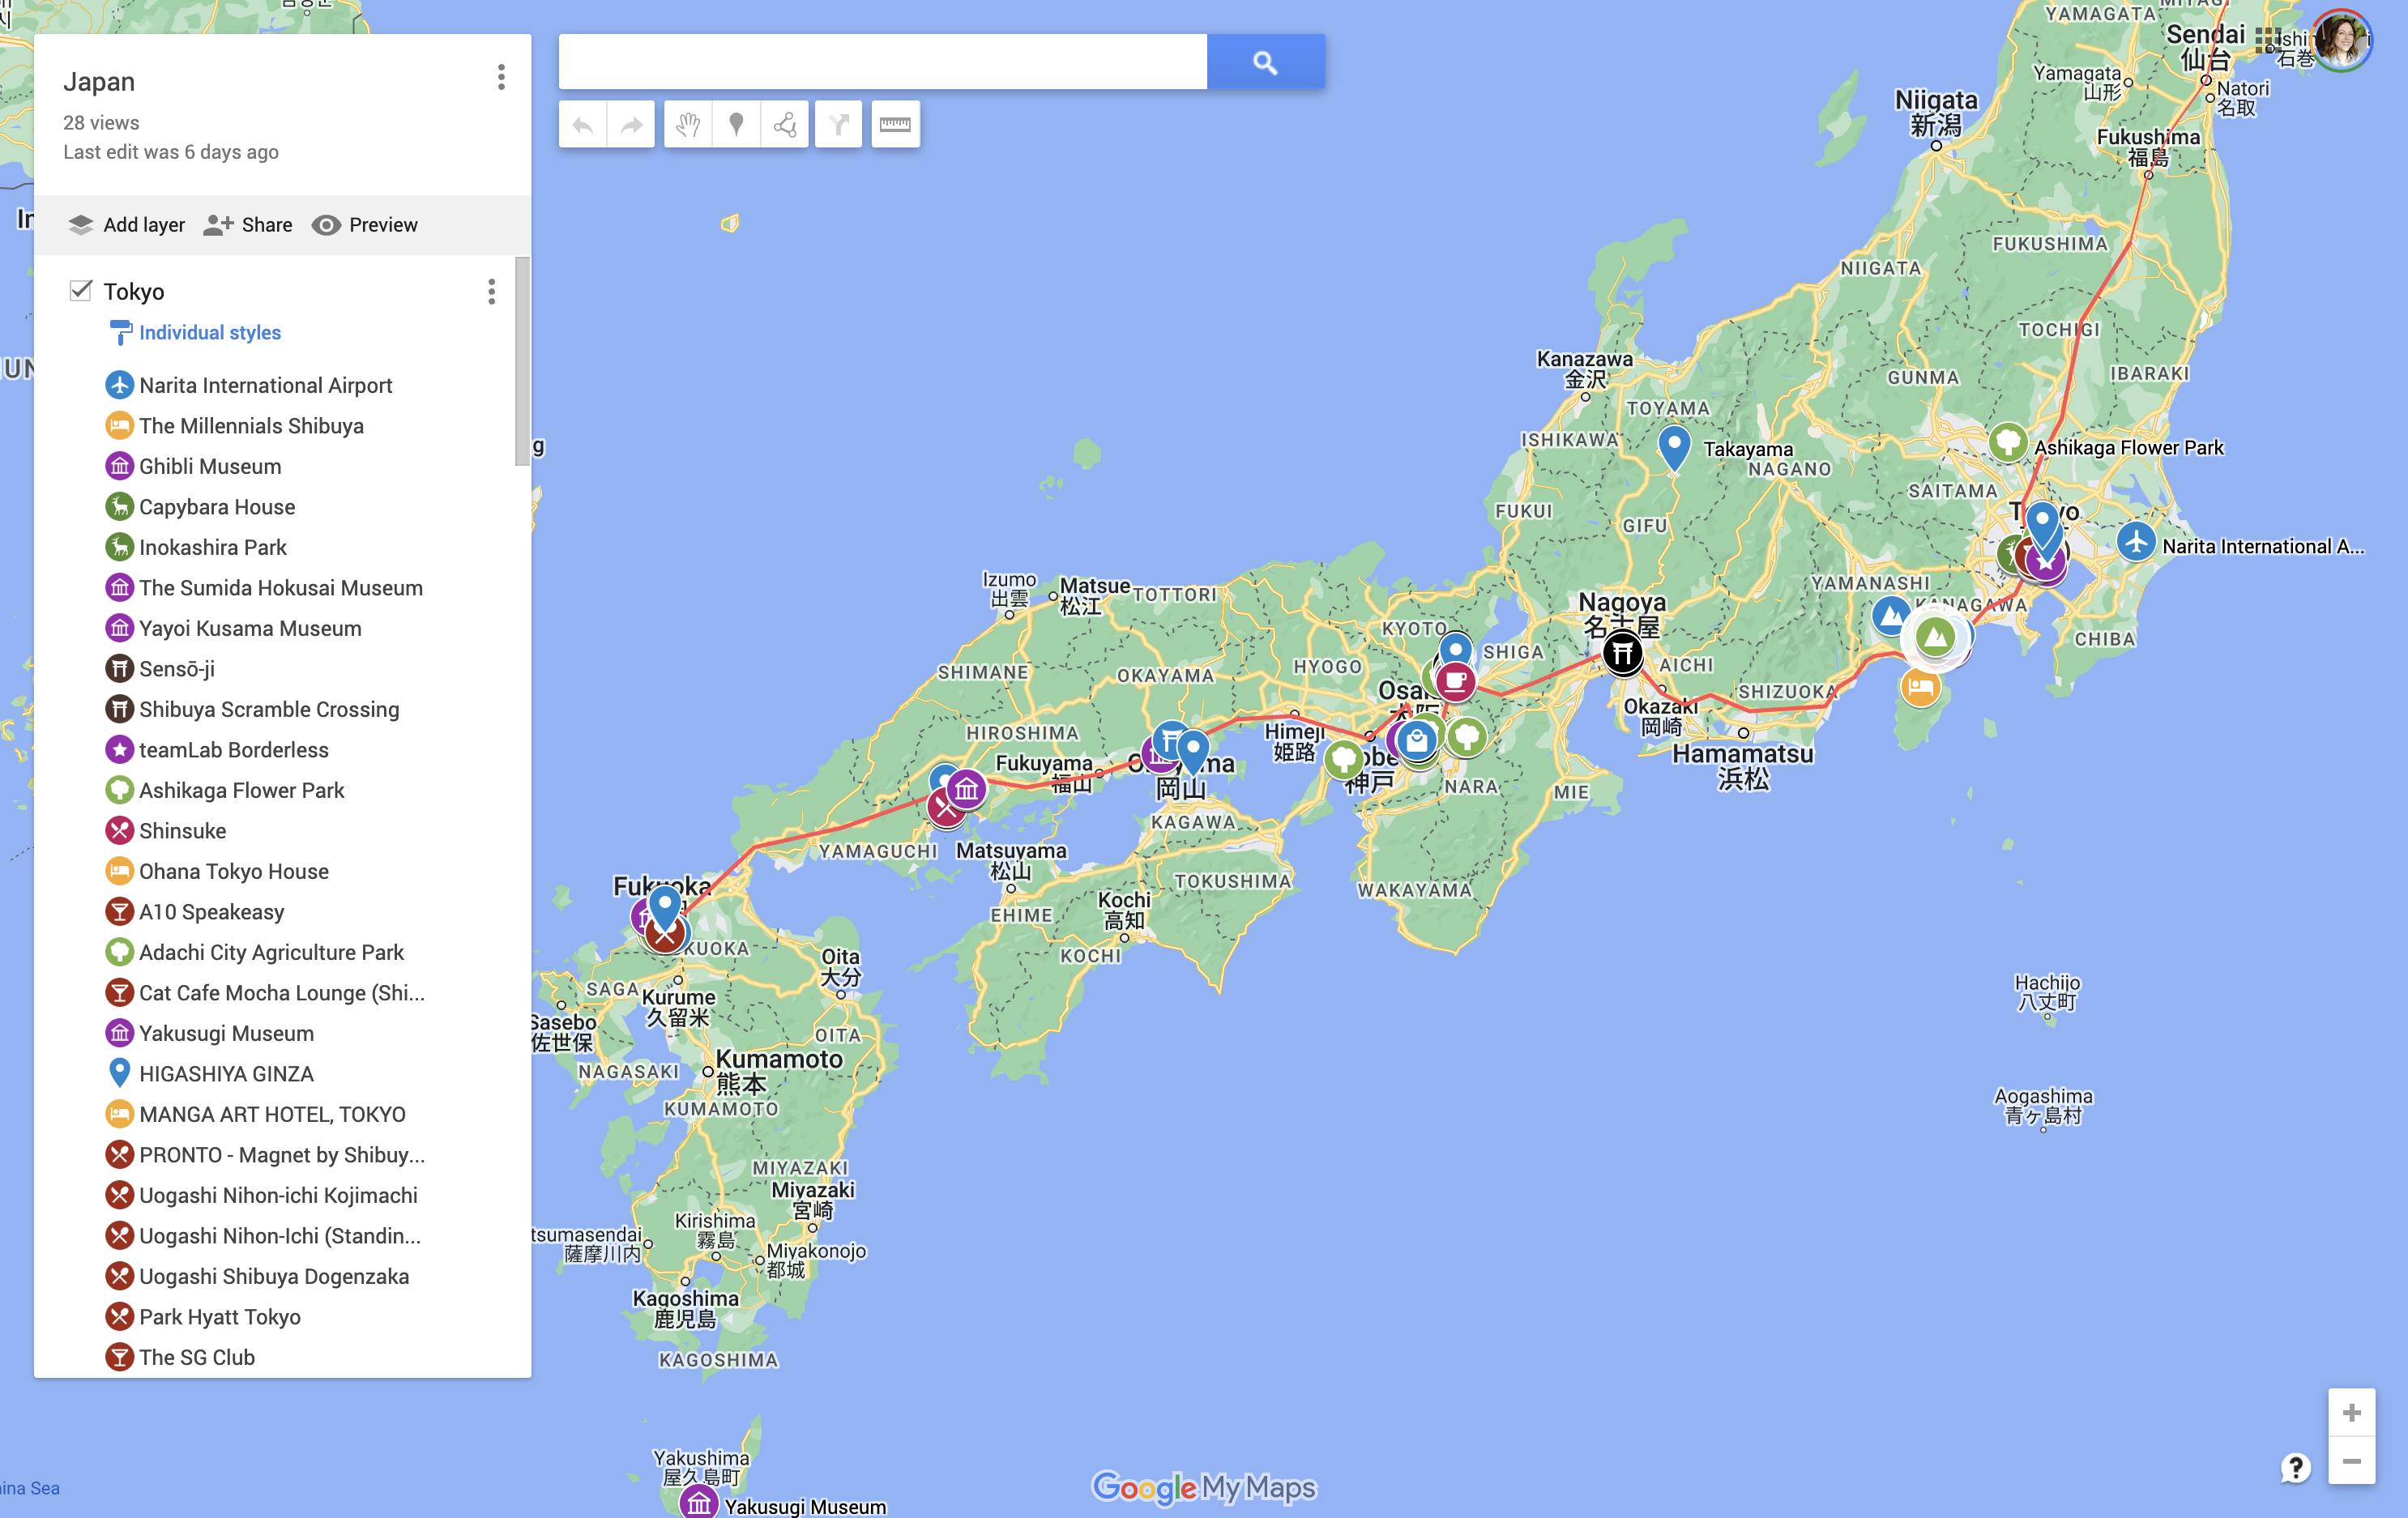
Using Google My Maps lets you create custom icons and add notes to your pinned items. You can then access this map from your Google maps so you can access it offline.
Using both Google My Maps and Google Maps we plotted distances between key areas and made choices about which cities to book accommodations, and which ones to visit as day trips.
Add your Activities
As we continued our research and learned more about Japan, we would add activities to the Activities database, relating it to the Place (city) so we can group the information by location.
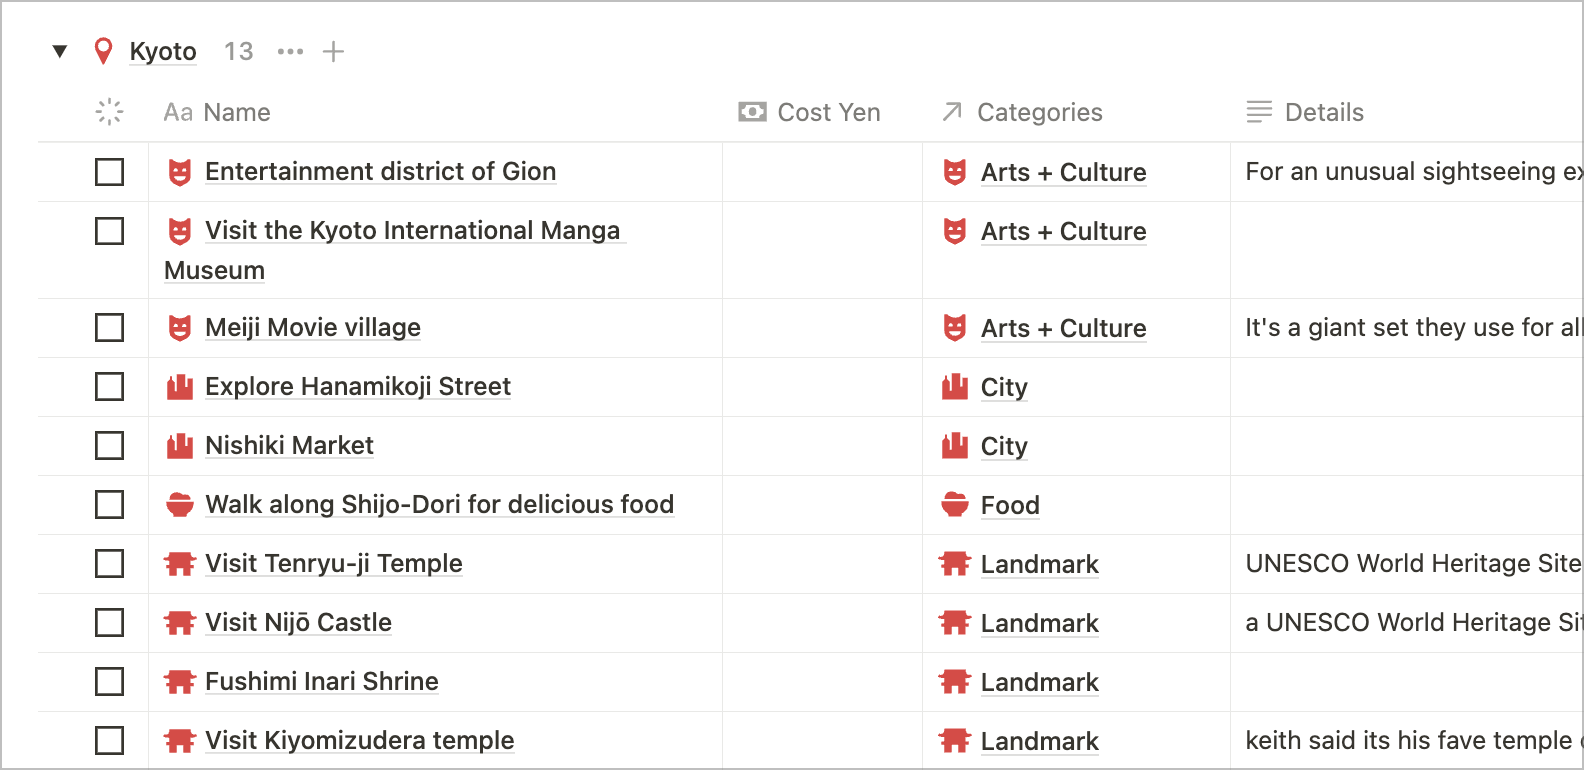
Only time-sensitive activities use a date property. This allows us to have an itinerary of possible activities without needing to plan every single detail.
(The categories can also be done as a multi-select for simplicity)
Budgeting
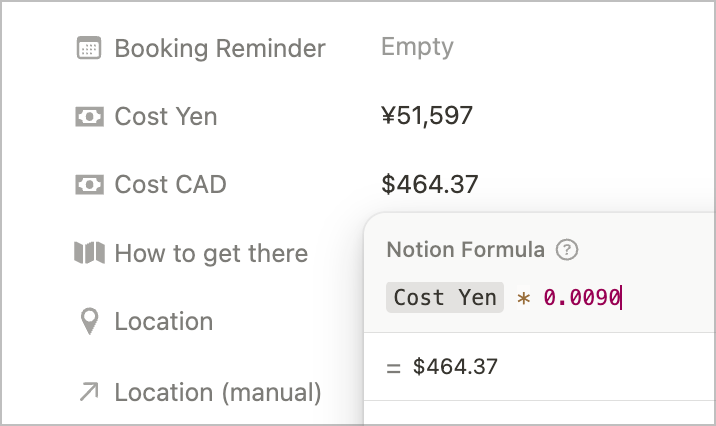
Adding a property for cost can be helpful for budgeting purposes. In this example we have “Cost Yen” which is a number property formatted as Yen currency, and then “Cost CAD” which is a formula property which calculates the exchange rate of the Yen to the Canadian dollar automatically.
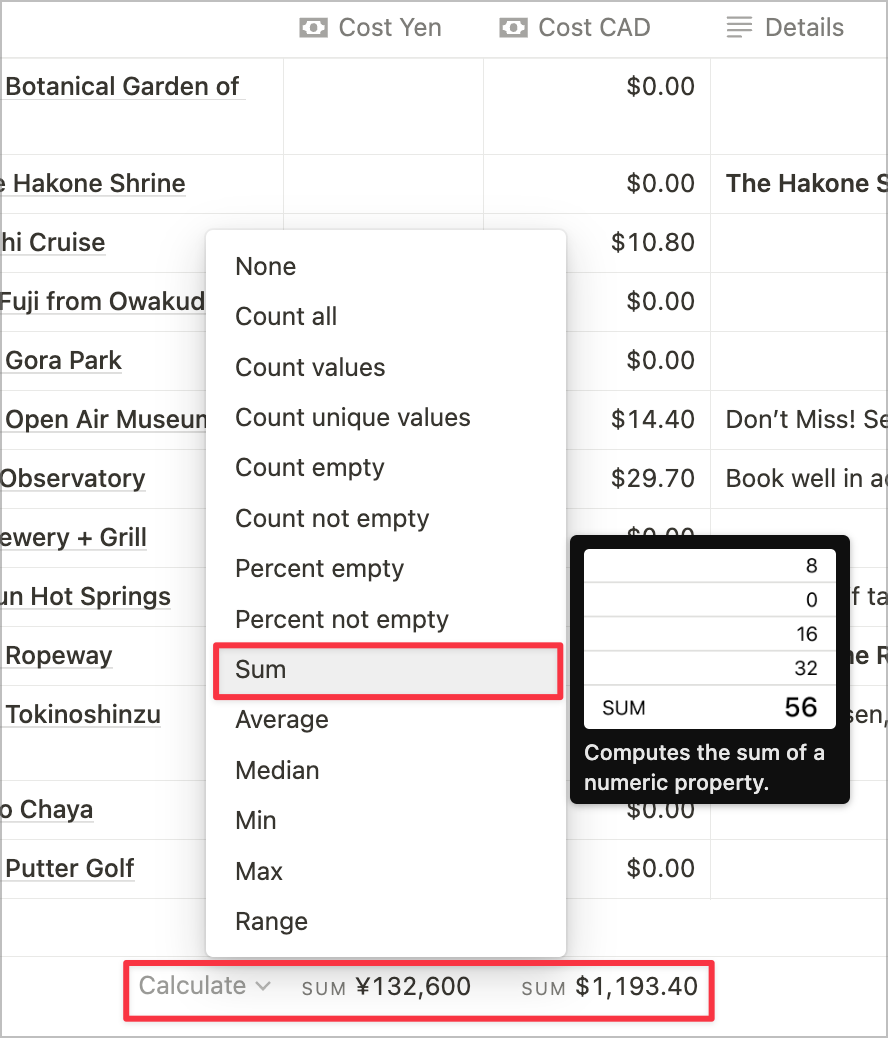
Having a number property for costs allows you to be aware of and plan for your budget and costs by viewing the activities in table or board view.
Just make sure to turn on “Calculate” at the bottom of your tables!
Loosely plan the Itineraries
Once we’d made some choices about things we knew we wanted to do for sure, we started to make some loose itineraries for each major city.
We identified events that were time-sensitive or required advance booking, and that began to help shape our decisions around which cities to visit in which order, and for how long.
The itinerary database is the main calendar view for visualizing the trip. This allows us to see at a glance which days are spent in which city, which then helps us identify our key travel days.
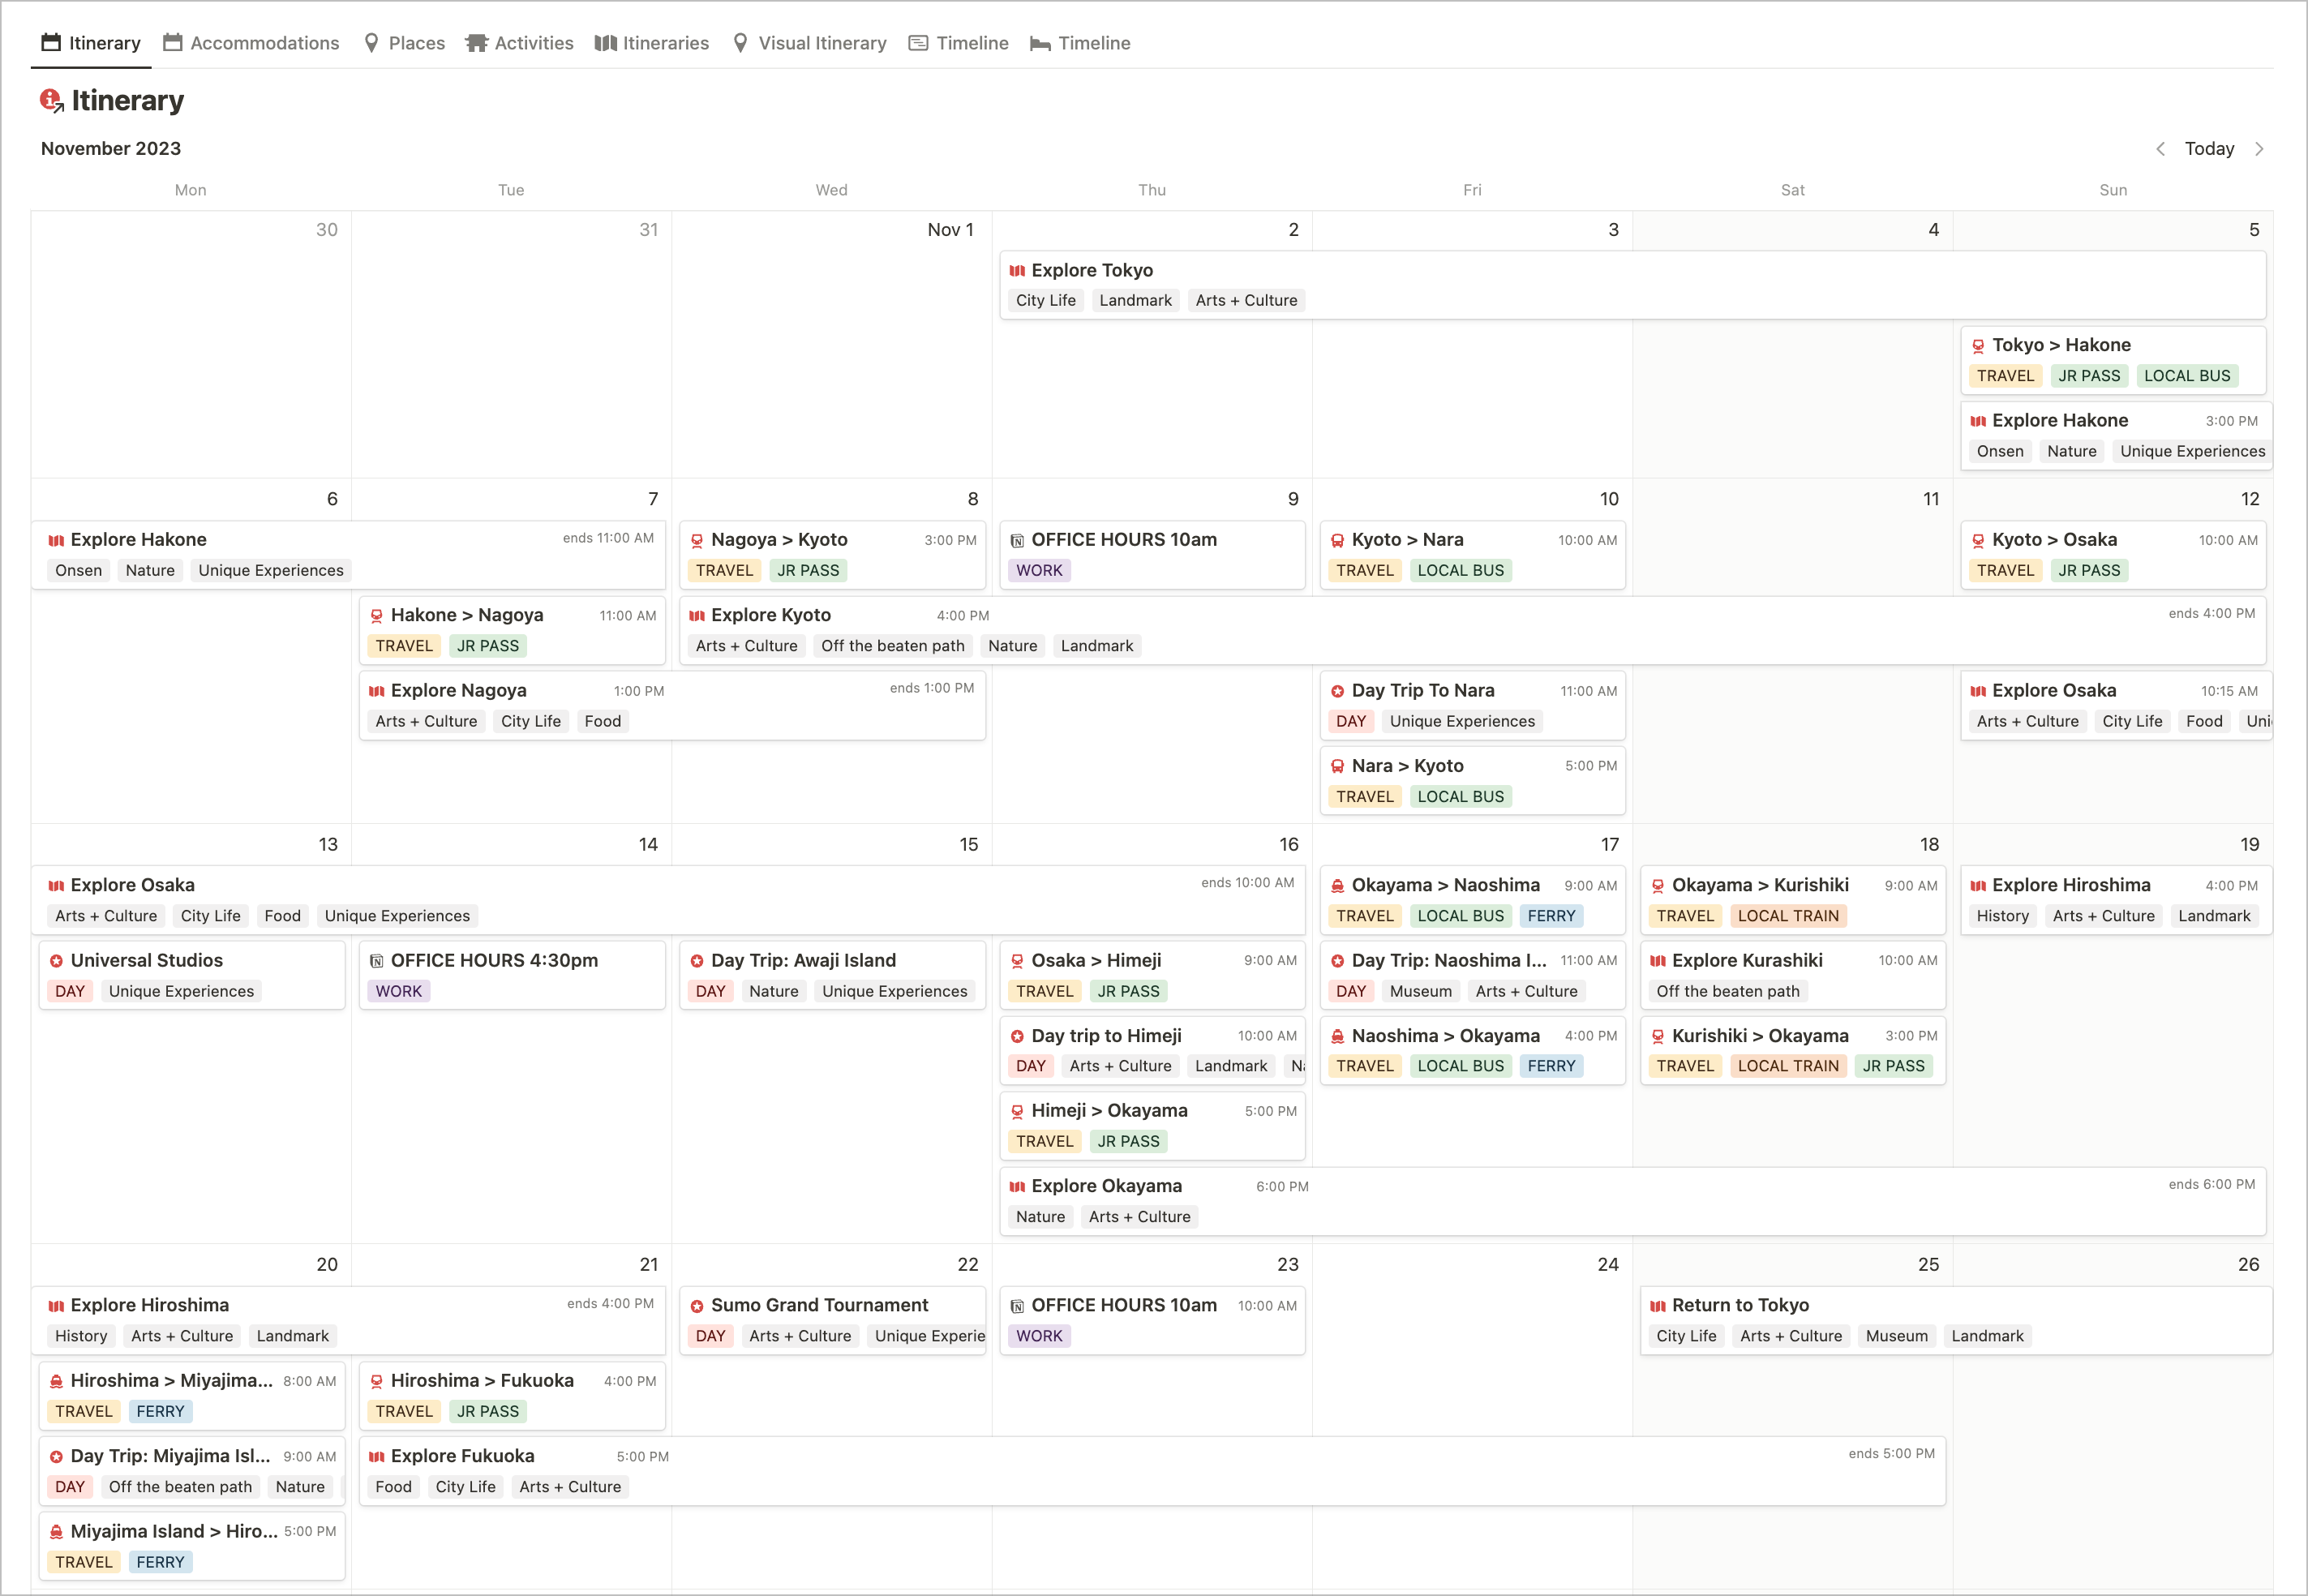
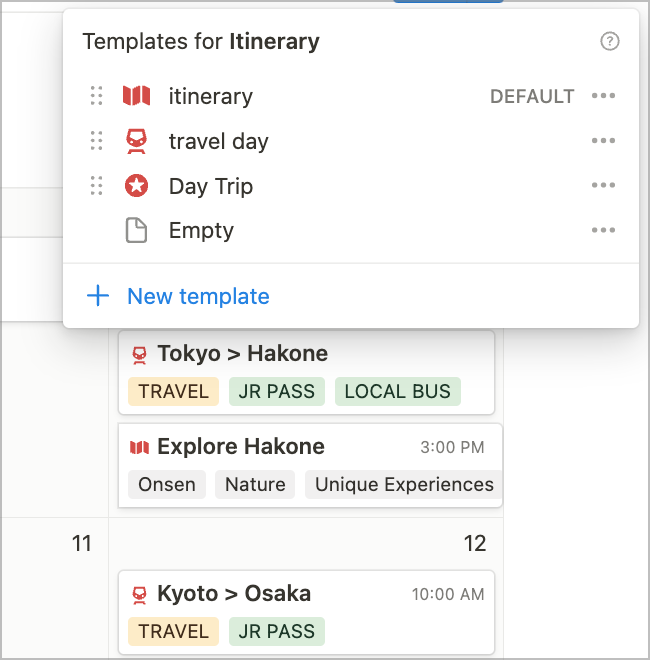
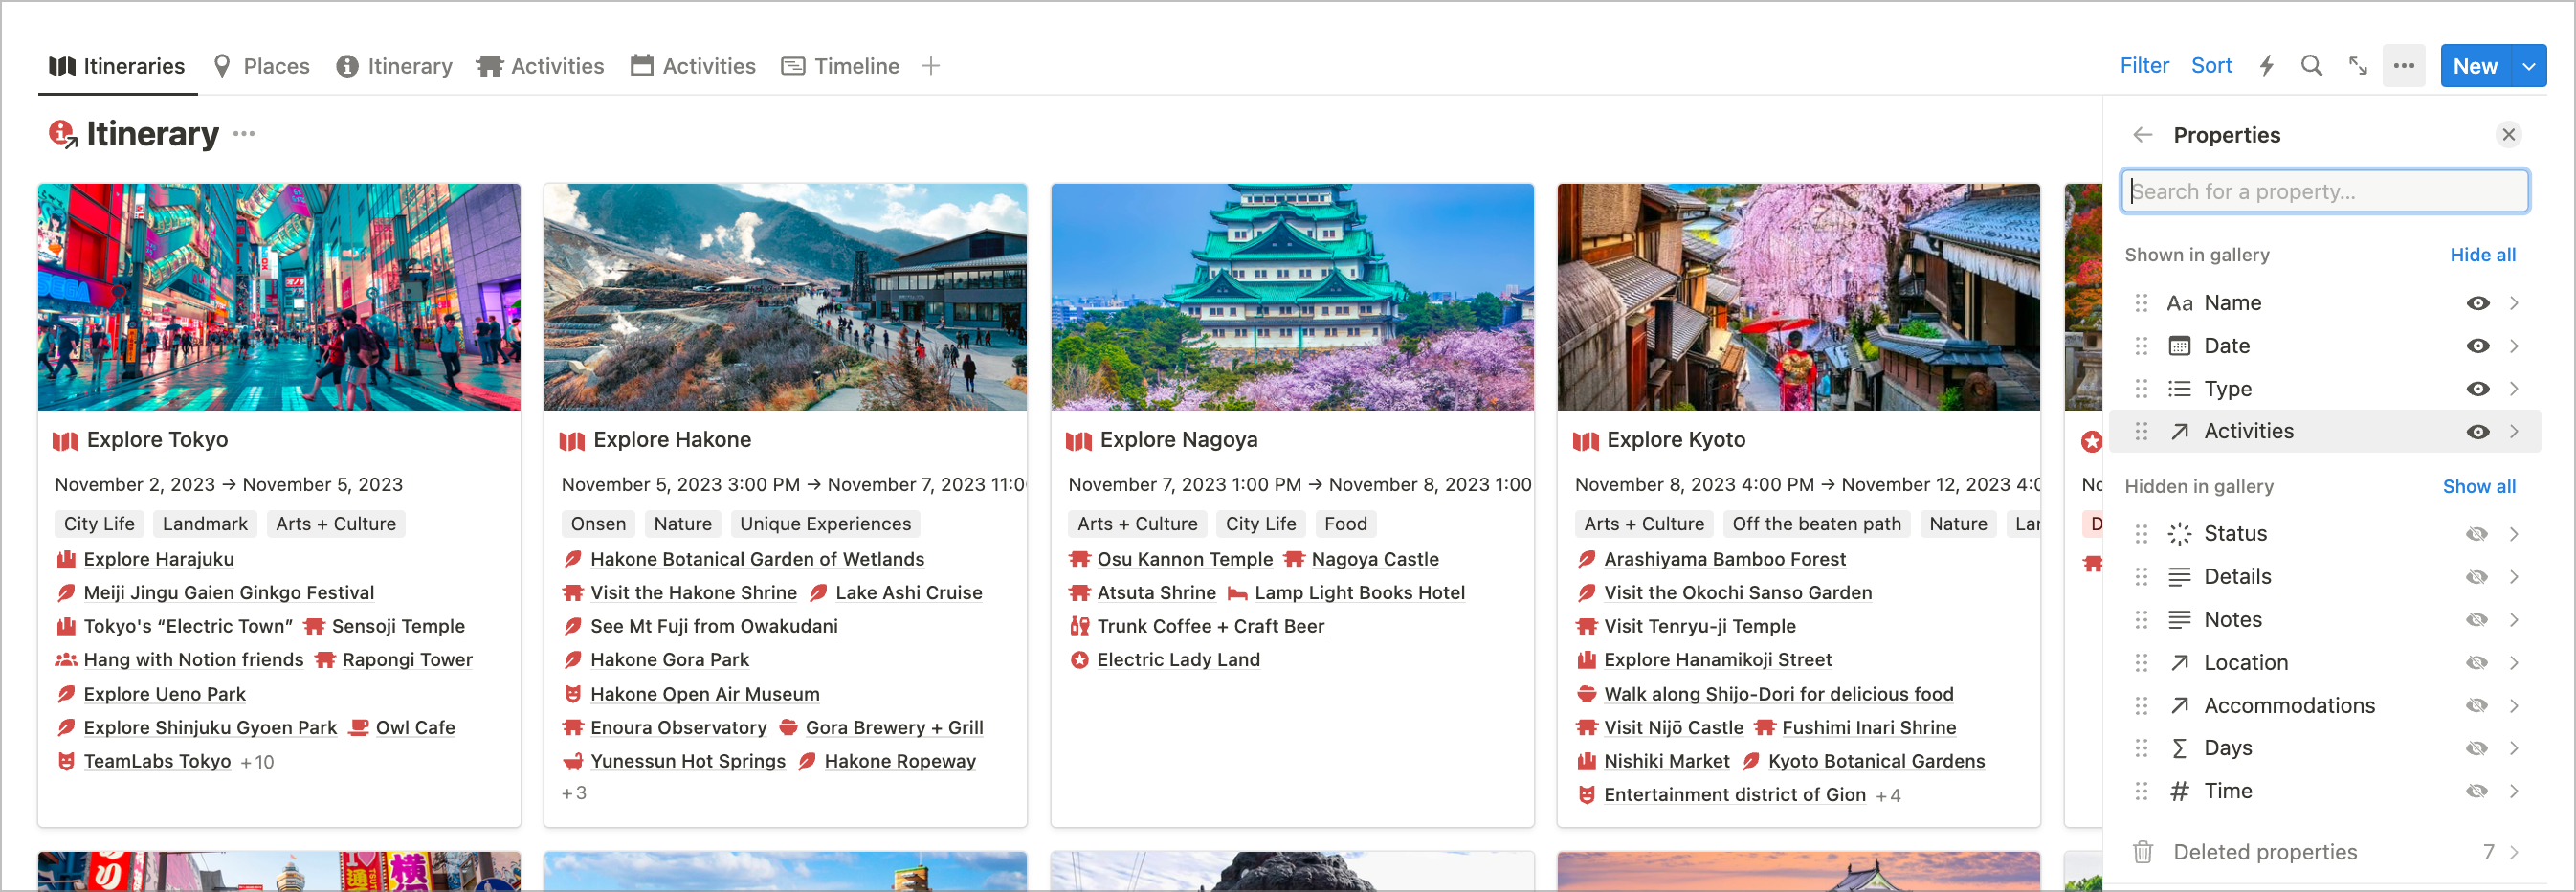
A simple icon and tagging system helps me see at a glance if something is a travel day, a day trip, or a main itinerary.
Each itinerary is a page in the itinerary database that contains a linked database of all of the activities related to that itinerary.
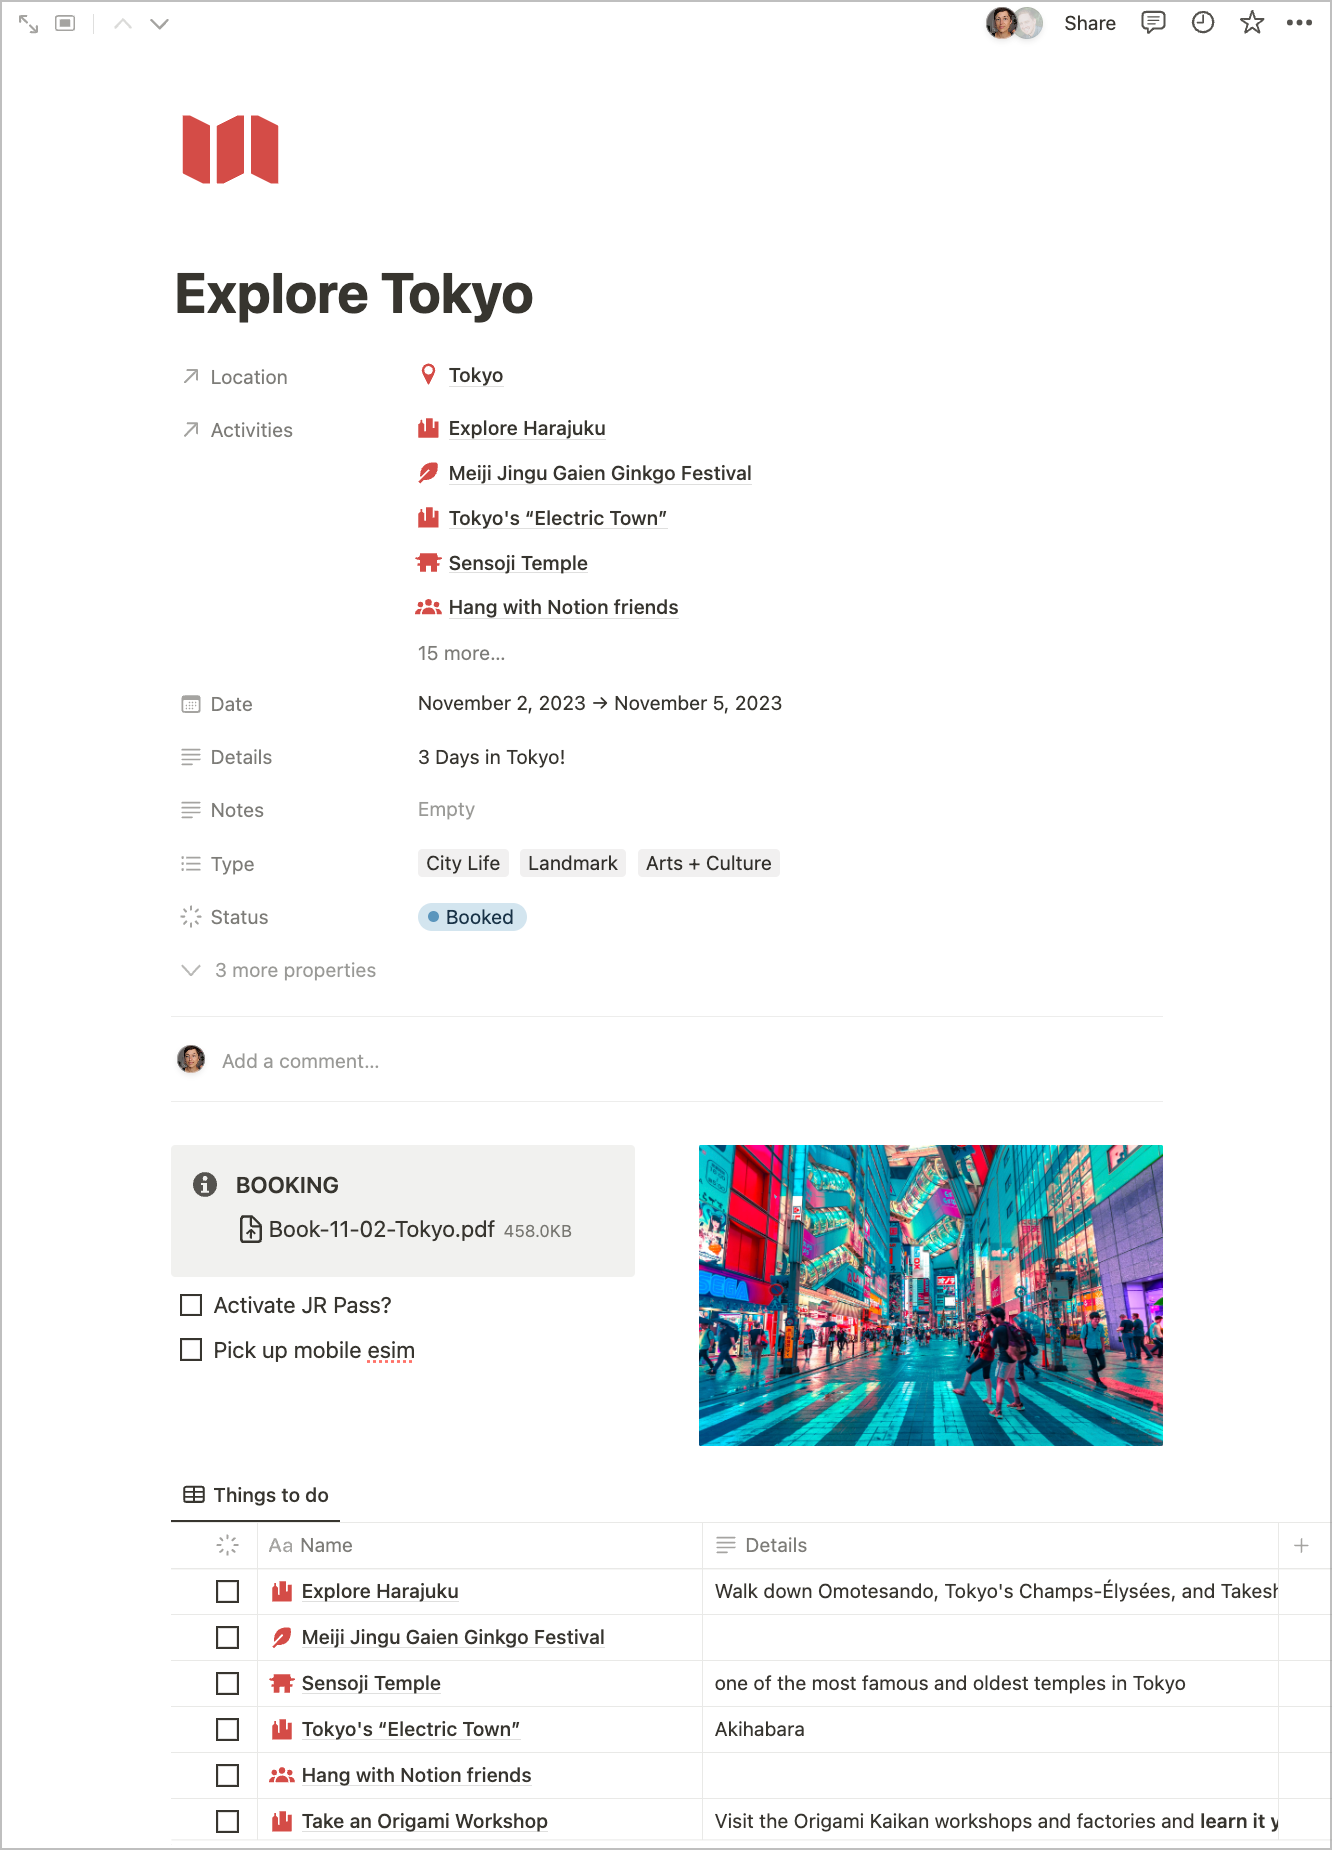
The itinerary database has properties like:
- Date (start and end date so it shows up accurately on the calendar)
- Location (relation to the Places in Japan database)
- Activities (relation to the Activities database)
- Details (can add location notes, address etc)
- Notes (“museum closed on Mondays,” etc)
- Type (what type of activities or vibe)
- Status (Planned, Booked, In Progress, Needs Reservation, etc.)
- and a few other custom properties.
Inside the page I include any booking information related to the itinerary. In this case the hotel booking pdf confirmation is shown here within the itinerary page, AND is also attached to the specific accommodation page within the activities database.
Having this activities database inside the itinerary allows us to browse the list or group it by category so we can decide day by day what we want to do in a somewhat spontaneous fashion. Choose from the list, or explore by foot and see something that maybe wasn’t on the list!
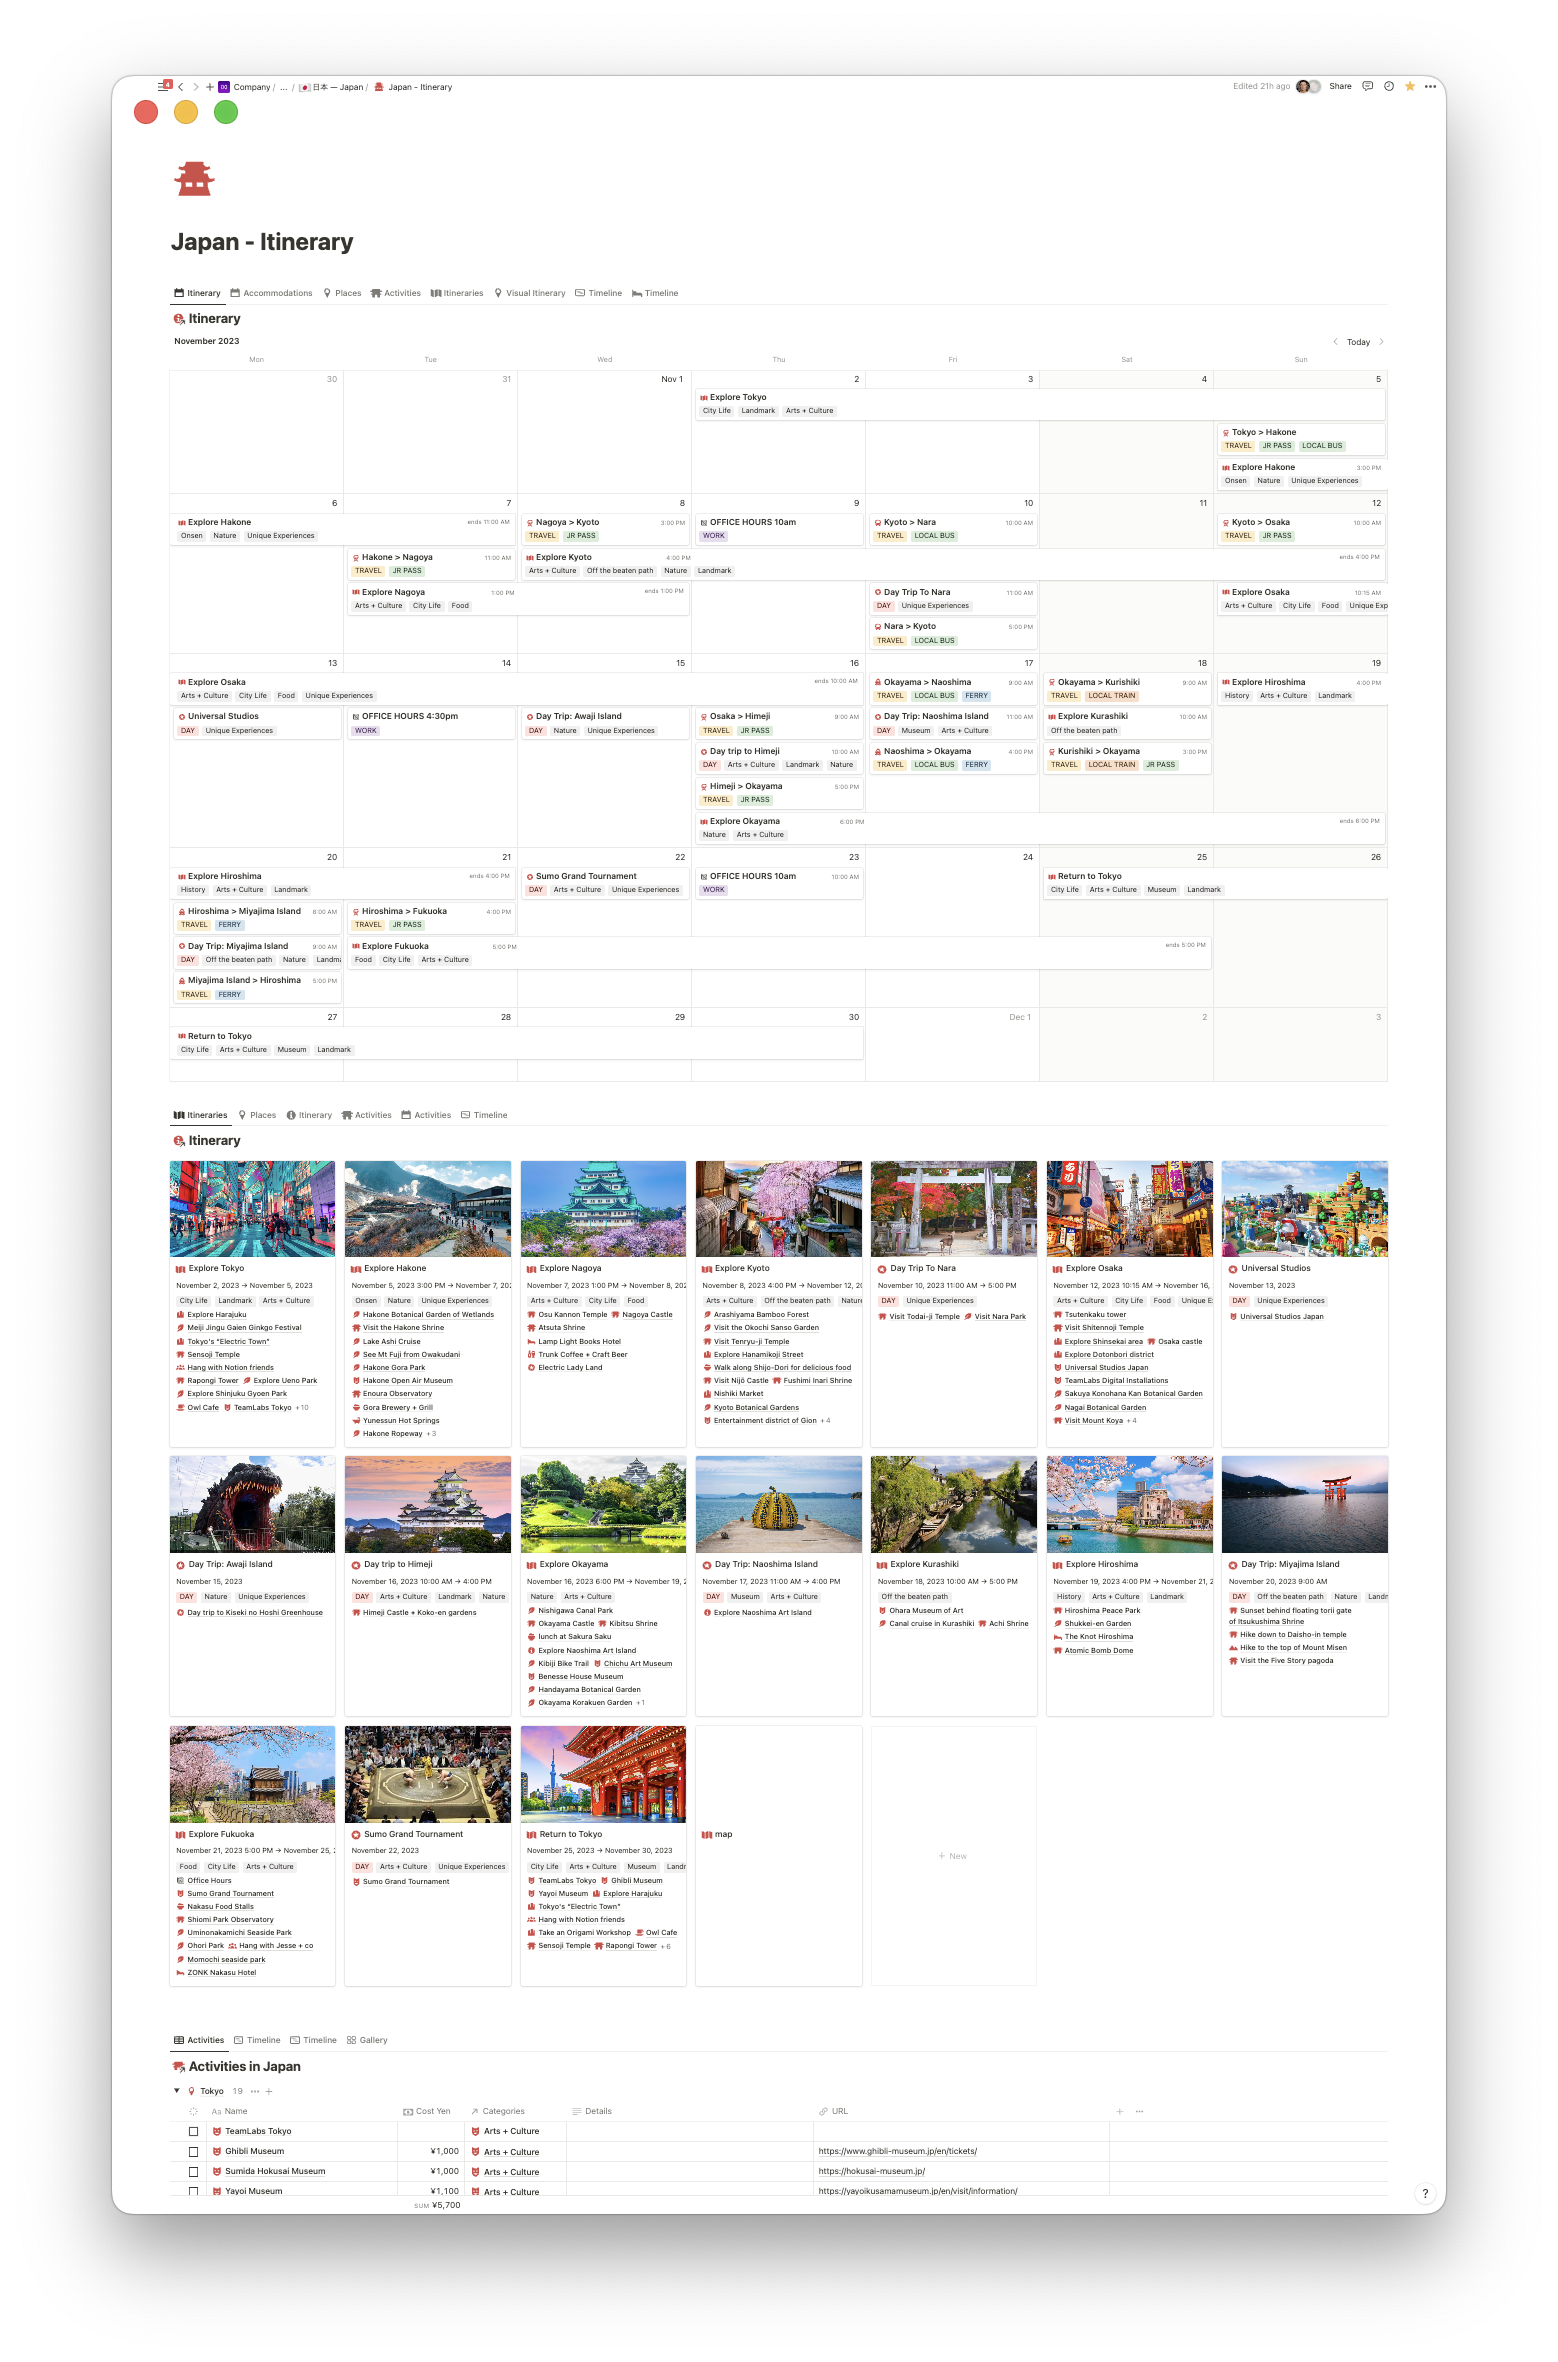
And because I’m such a visual person, below the itinerary calendar view I like to display the itinerary again in a more visual fashion, along with a few other views of the various databases.
This way I always have the calendar visible, while other databases and views can be accessed below.
Below the visual itinerary I display the activities database grouped by location. This makes it super quick and easy to add new activities while relating them to the appropriate city.
(To create a linked database in Notion: Type /cr and choose create linked database, then search for your database name.)
Make essential bookings
4-6+ Weeks out
Once the general structure and flow of the trip was in place, we started booking our accommodations, mostly using Booking.com (and an occasional Airbnb). Booking.com has a great reward system with accumulating discounts, so the more you book, the more affordable your future bookings become. The quality and price of Airbnbs have really changed over the past few years, with the price often being more expensive than hotels, so Booking.com usually won out when I was doing comparisons of price vs quality.
I downloaded PDFs of all the booking confirmations and attached them to the appropriate itineraries/activities and then printed out paper copies of each one to have backups.
In all likelihood I’ll also do print-outs of the itinerary and activity database as well.
Enjoy the trip!
This system has been super helpful for reducing the overwhelm of all the decision-making and research involved in planning a big trip like this.
I also have a separate system for planning my packing list, since I tend to do very minimal one-bag travel. This means I have to be very discerning with what I bring with me, so I like to plan this in advance! I’ll cover that system in more detail in a separate post!
Did you enjoy this post? Have any questions about the system? Ask away!
YES I will share a Notion template soon! Jump on my list and I’ll be sure to email when it’s ready.
[*For full disclosure, I’m a *Notion Partner, so when you sign up with my link, you also help support me and my content!]


Would really love the template for your Japan trip, as well as afterward if you have any specifc recommendations or comments of things that were great!
Oh enjoy! Japan is amazing! Hubs and I used Notion to plan the trip we used in Feb. Man did it help! We went from Tokyo to Fukuoka too. (A few different stops in between.)
I just reread this gem ahead of a trip to South Korea, so good.
Did the template ever get shared for this? I’m on the mailing list but haven’t seen anything…