Since getting my ADHD diagnosis 4ish years ago, I’ve become acutely aware of some of my own unique challenges when it comes to both learning and creating.
As a teacher, I’m also deeply motivated to understand how different people learn, so I can create courses that truly promote helpful change.
I know that how I learn is not how everyone else learns.
My brain is hypervisual; I often see images and construct visuals in my mind when people speak. Sometimes I go on side quests, getting lost in the visuals and forget to pay attention to what’s being said.
I am hopeless with verbal directions, and I struggle with long blocks of text.
I often feel shame when people ask what books I’ve been reading lately, as the answer is usually… none.
Map making and visuals are how I see the world and make sense of information.
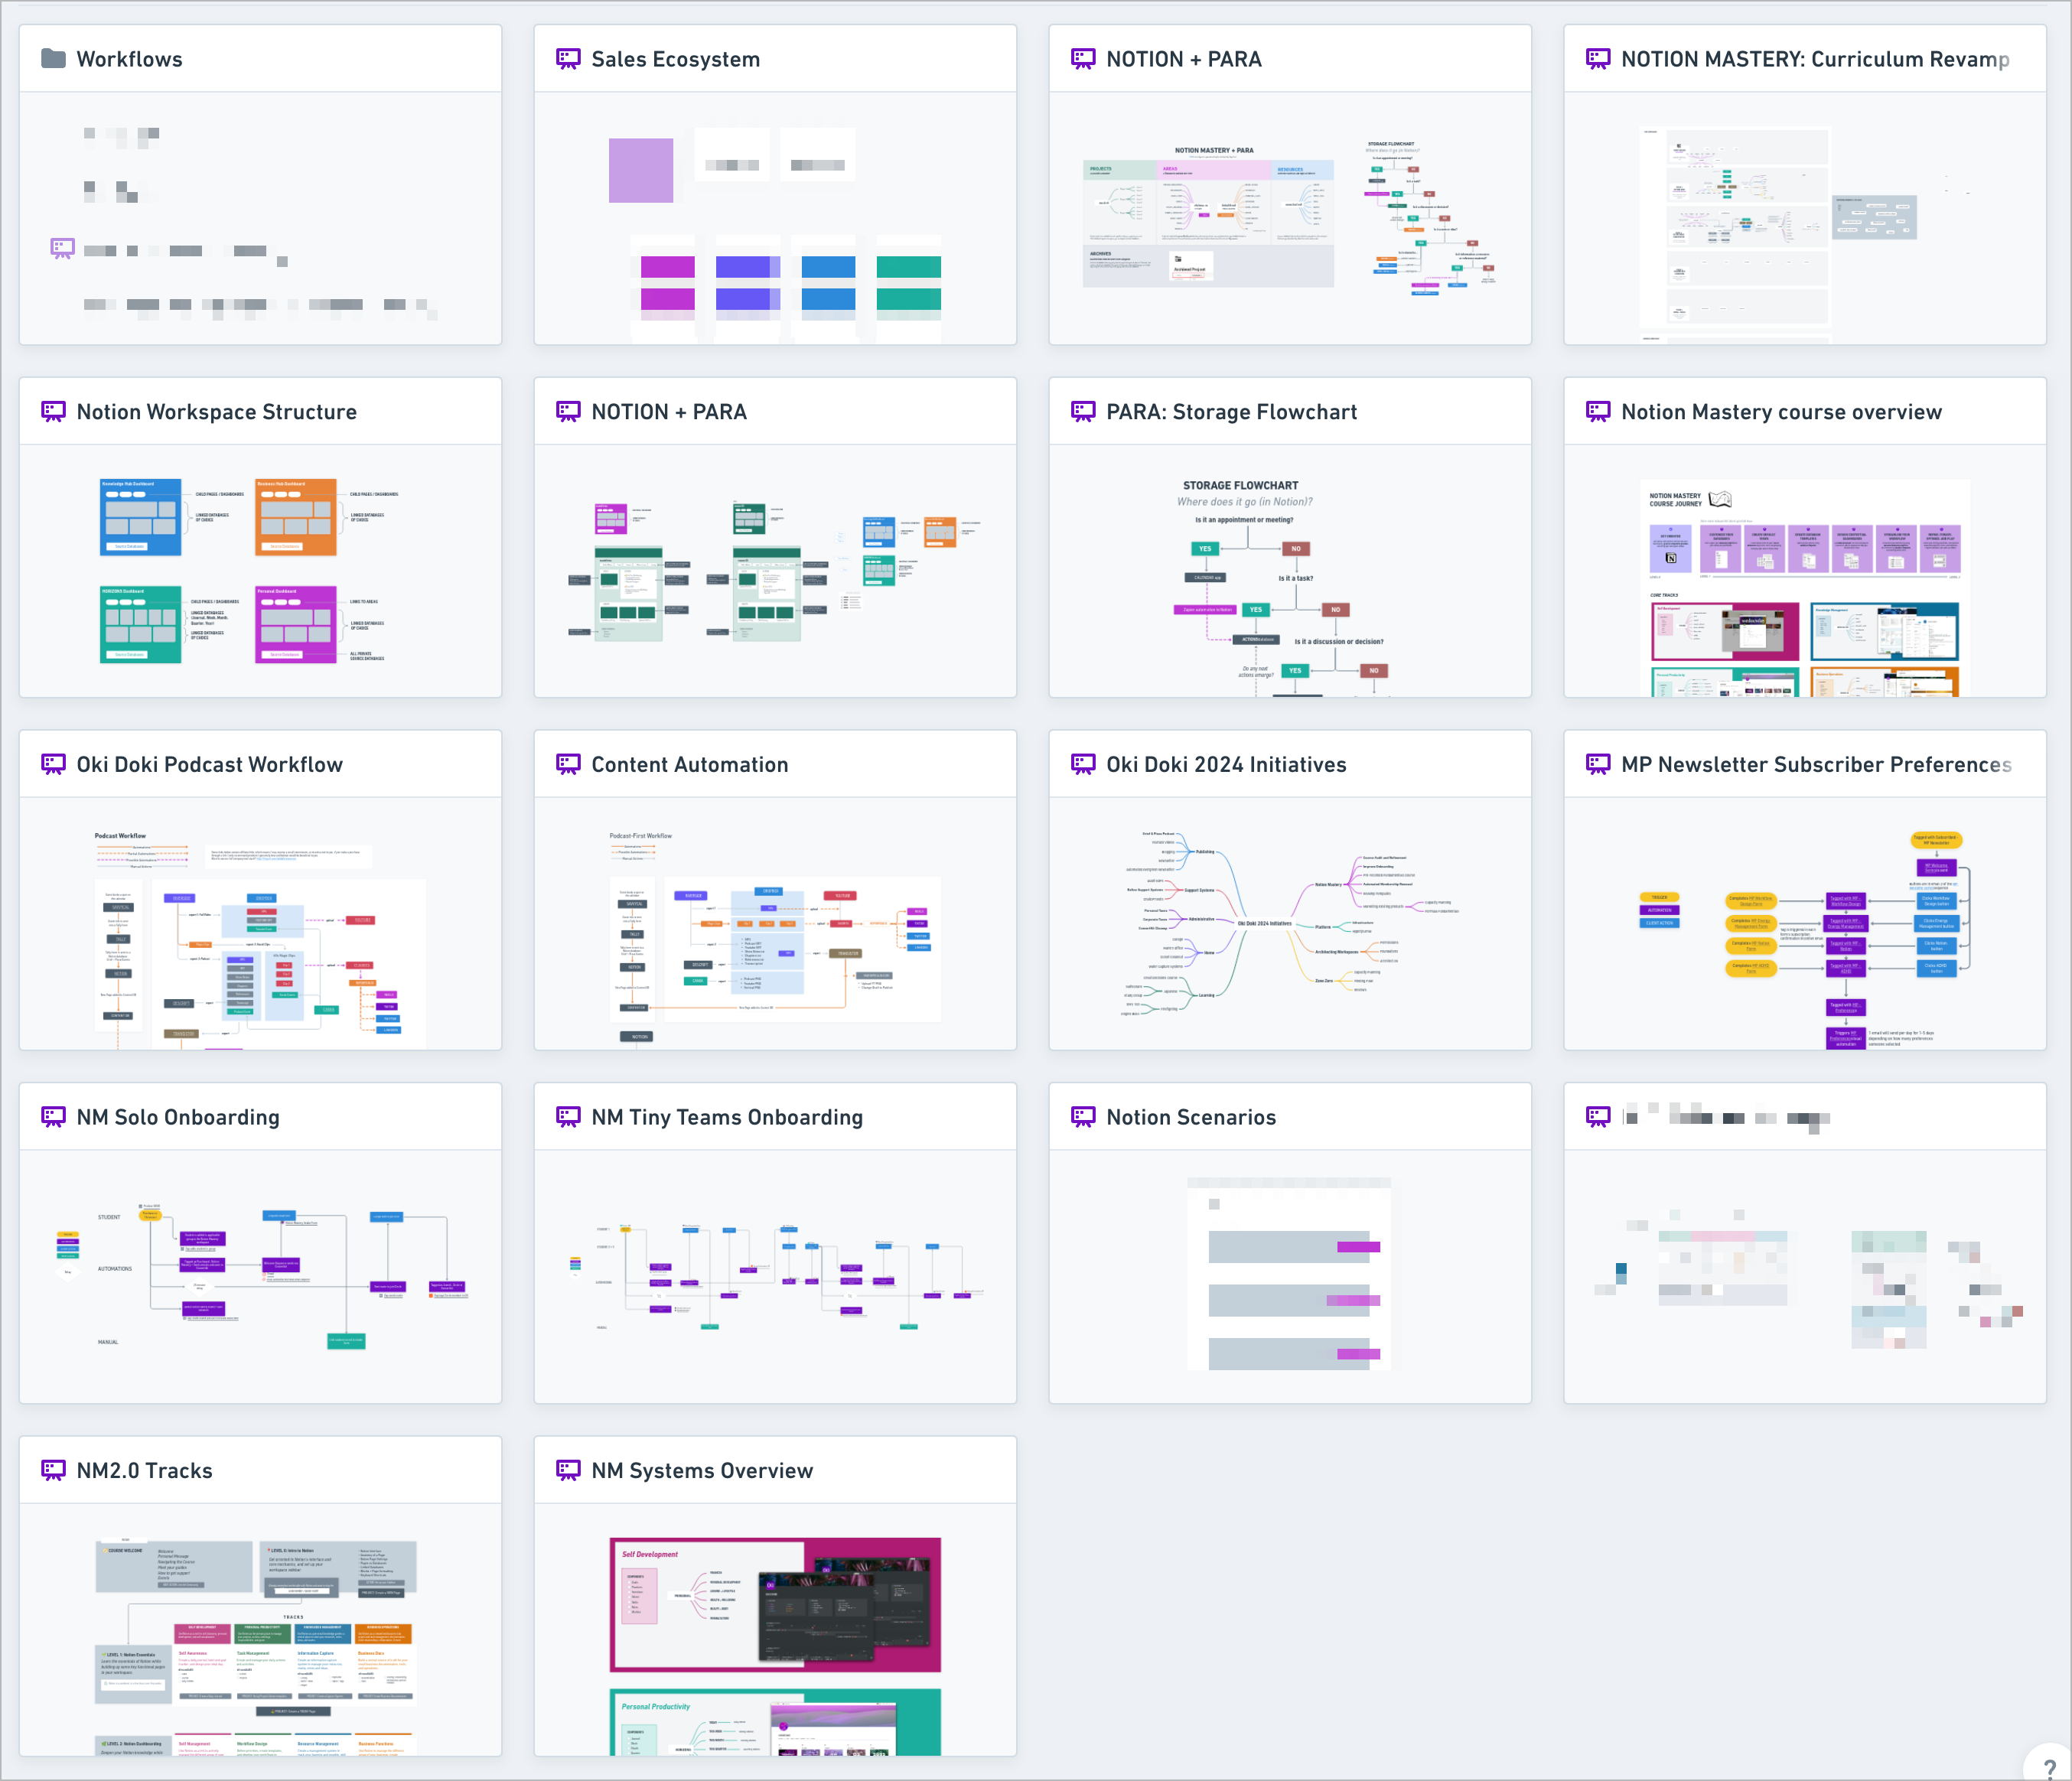
Whimsical helps me clarify my thinking
Probably my second favorite software: Whimsical!
Which brings me to the topic of Learning Projects. I’ve come to realize that in order for me to really learn something new, I need a visual approach.
I’m a huge believer that anytime you’re learning something new, you should create a Learning Project; a “container” for the learning. A place where you can name your intention or goal, give it a timeline, capture resources and reference material, create notes and documents, and assign routines or action items to support you in your learning.
I’ve been working on my permaculture diploma since 2019, and it has been challenging to make any meaningful progress on it. At one point I marked the project as archived and figured I’d just let it disappear into the abyss.
But a follow up email from my wonderful mentor Delvin re-activated my excitement. (He’s been so patient and encouraging with me during this process!)
I’ve gone through the cycle of excitement and procrastination many times on this project… how could I ensure that this time would be different?
I took some time to get reflective about the project, and try to unpack why I was having such a block around it. Most of the “work” had already been done, it simply needed to be documented.
I eventually deduced that the project criteria and “next steps” felt murky; I couldn’t really see them easily. I had many long emails with descriptions, explanations, criteria, examples, and checklists. Each email contained many different types of information, making it difficult to parse what was an action item, a project, simple note or “FYI”, an expectation or requirement, etc. There’s so much goodness in these emails, but it’s also challenging for me to translate into next steps!
I needed to chunk the project down, and identify the different types of information (which is achingly difficult for many folks with ADHD).
I realized that if I was seriously going to follow through on the project, the next obvious step was to create visual aids and structure.
And what better place to do that than Notion?
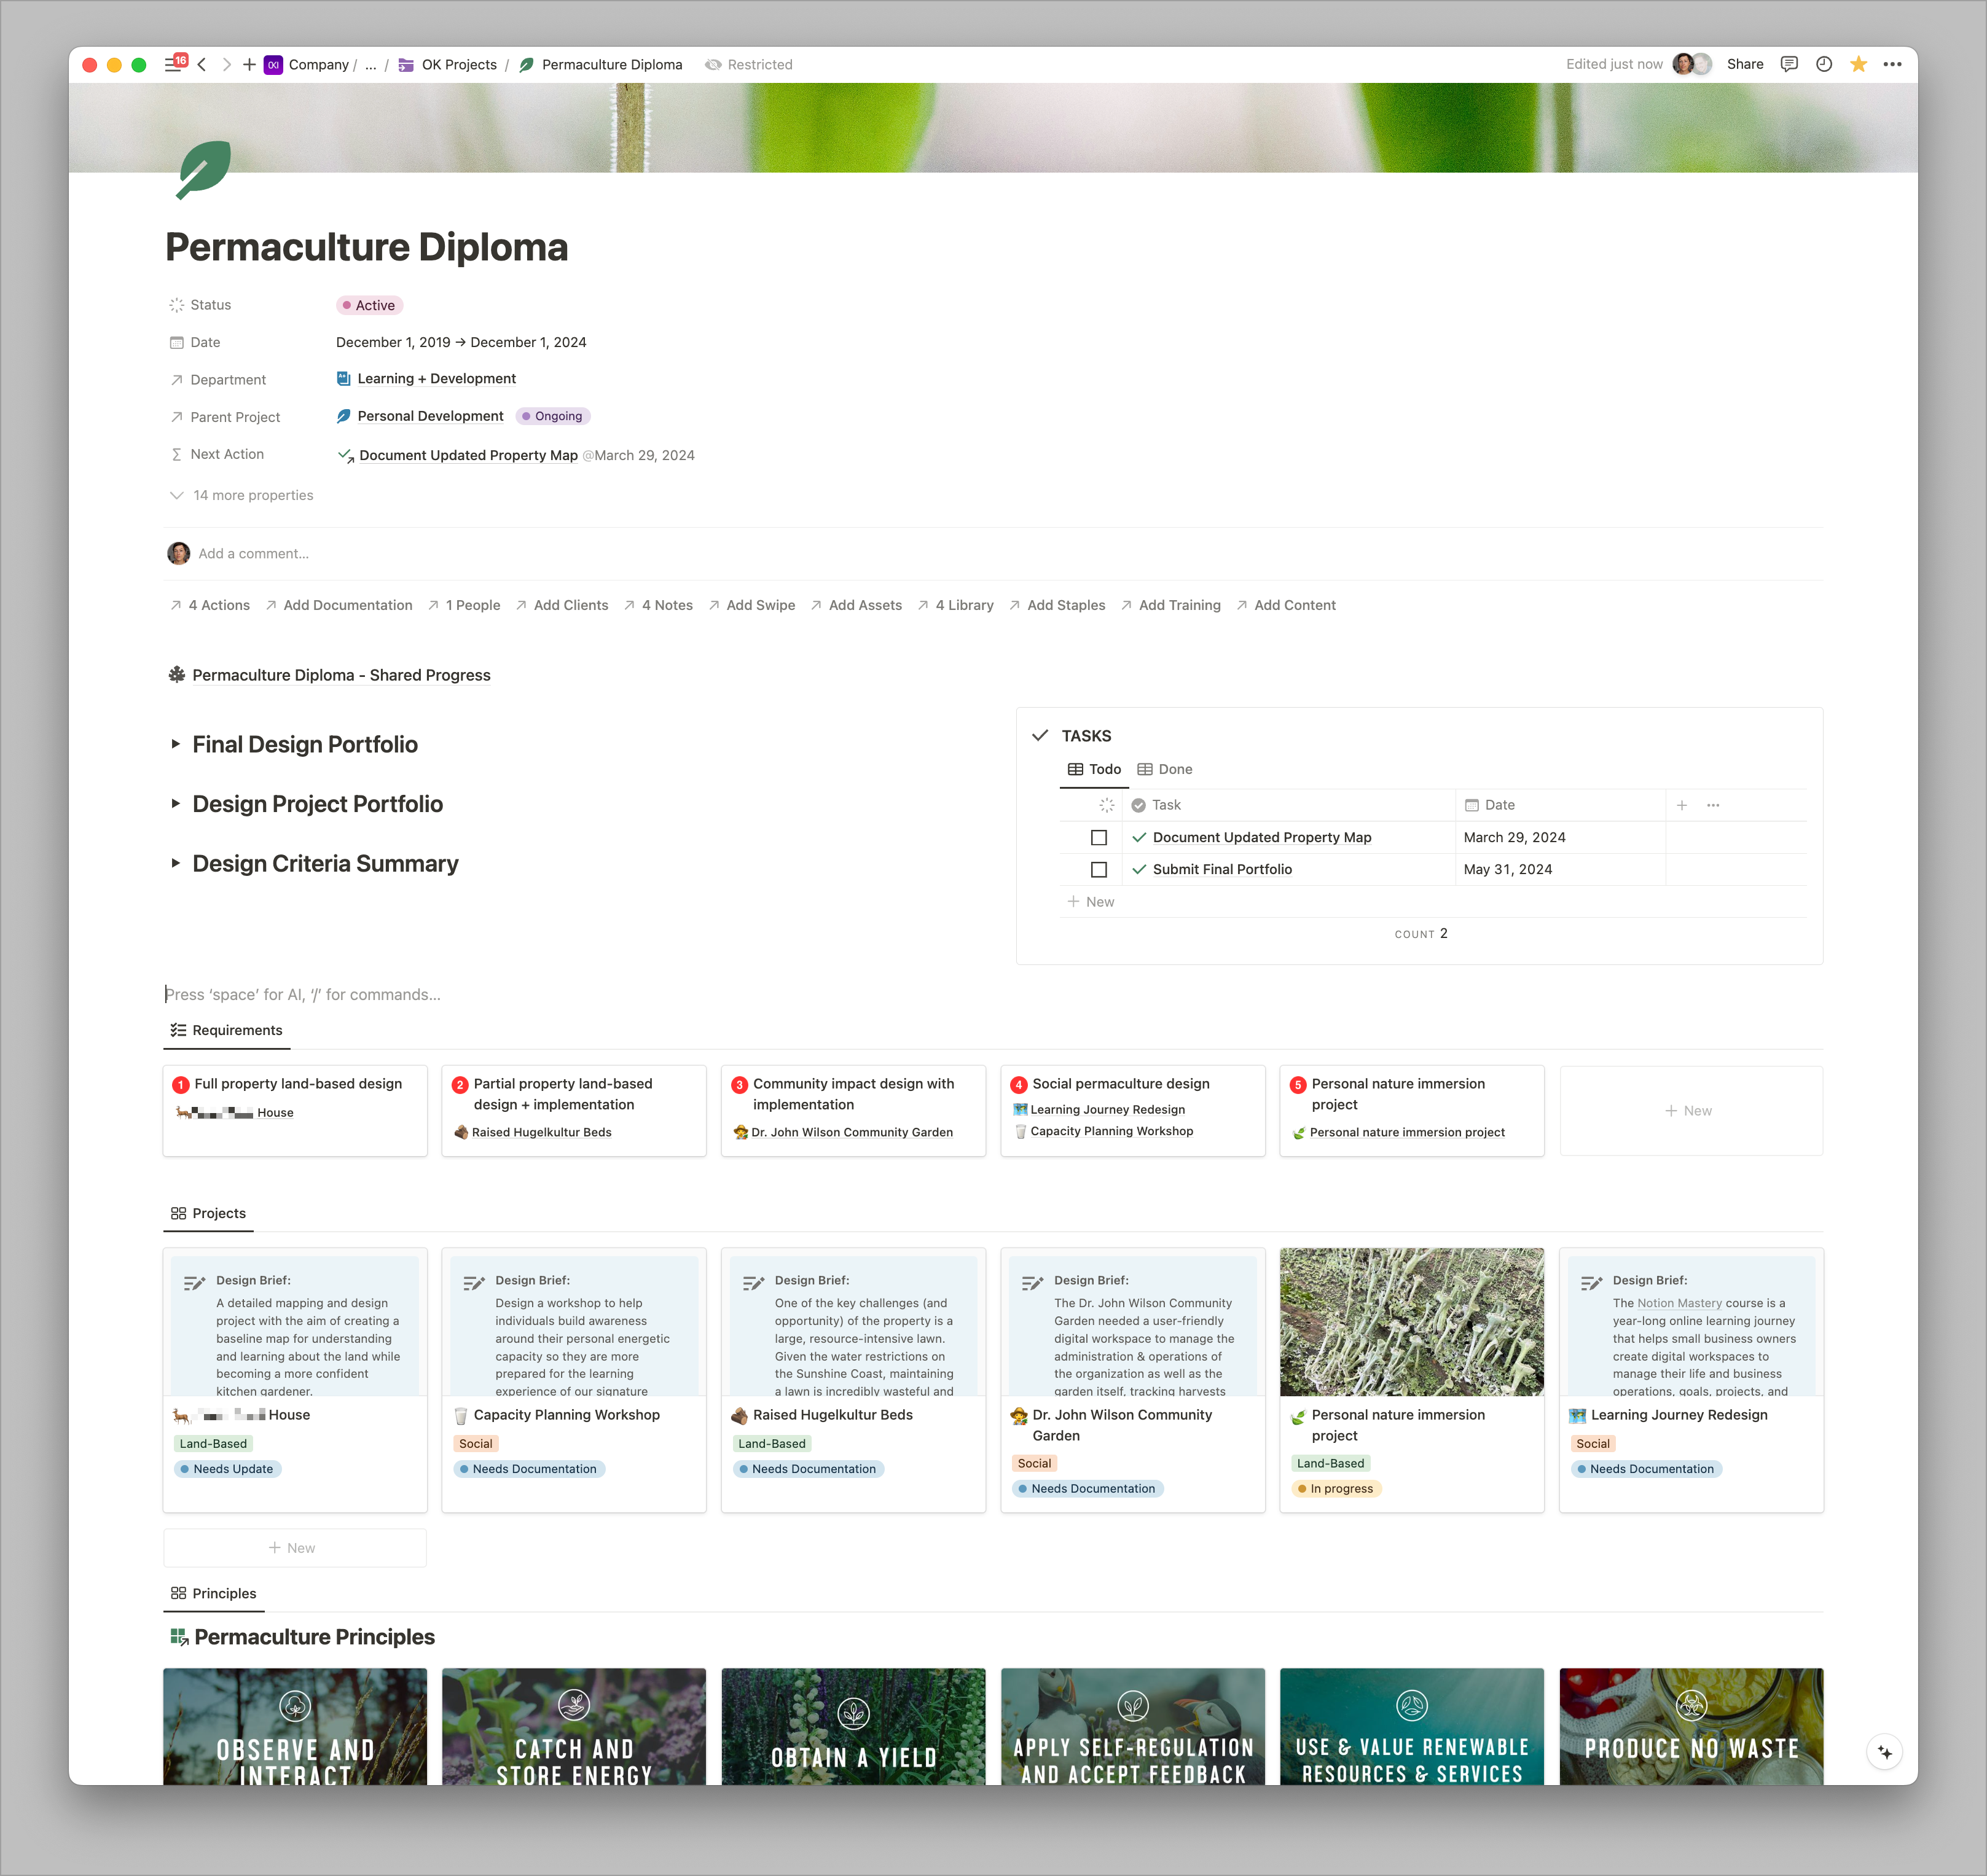
I already had a Permaculture project in Notion, but I knew I needed to bring in even more structure, and create databases specific to this particular project.
Step 1. Extract the information from the email
Here’s how I broke up the information and next steps with a little help from ChatGPT:
1. Understanding the requirements
- Final Submission Length
- Design Project Portfolio
- Final Design Portfolio
- Recommendation Letters
2. Organizing the work
- Design for completing the diploma
- Create a detailed plan for how you will complete the diploma requirements.
- Design Project Portfolio
- Focus Project Documentation: Choose one major project for an in-depth documentation.
- Other Projects Summary: Document other projects concisely.
- Medium of Expression: Decide if you want to present any of your projects through video, photography, etc.
- Final Project Portfolio
- Creative Sharing: Plan how you’ll creatively share your learning journey.
- Personal and Professional Life Integration: Prepare a draft that showcases how permaculture design principles apply to your life and work.
3. Design Work Requirements
- One Full Property Land-Based Design
- One Partial Property Design with Implementation
- One Community Impact Design
- One Social Permaculture Design
- One Personal Nature Immersion Project
4. Action Items + Admin
- Pay Annual Registration fee
- Plan for at least two mentorship check-ins and allocate budget for mentor’s time
5. Timeline + Prioritization
Step 2. Identifying next steps
I then leaned on ChatGPT to help me align my current projects with the diploma criteria. Here’s the process ChatGPT recommended to me:
1. Inventory Your Projects
List all your projects, including any work you’ve done that could potentially meet the diploma requirements. Include even those projects you might consider minor or peripheral. This broad view will ensure you don’t overlook any project that could contribute to your portfolio.
2. Match Projects to Criteria
- Full Property Land-Based Design: Identify the project that best represents a comprehensive approach to a property. This should showcase your ability to envision and plan for the entirety of a space, integrating various permaculture principles.
- Partial Property Design with Implementation: Look for a project where you focused on a specific aspect of a property. This project should highlight your implementation skills and the practical application of design in a focused area.
- Community Impact Design: Choose a project aimed at extending permaculture beyond private property, possibly involving public spaces, community gardens, or educational outreach.
- Social Permaculture Design: Select a project that emphasizes social aspects, like community building, organizational structures, or educational programs. This should reflect your understanding of permaculture in human communities.
- Personal Nature Immersion Project: This can be a more personal exploration, documenting your direct engagement with nature through observation, study, or creative expression.
3. Document According to Requirements
For each selected project, refer back to the specific documentation requirements:
- Major Focus Project: Prepare to document this project in-depth (up to 15 pages). This should be your most comprehensive work, demonstrating a wide range of permaculture applications.
- Other Projects: Plan concise documentation for each, ensuring you collectively cover the required 5 pages. Highlight the unique contributions of each project to your permaculture practice.
4. Compile and Revise
Assemble your portfolio, ensuring it flows cohesively from one section to the next. Include an introduction that outlines your permaculture journey and a conclusion that reflects on your learning and future directions. Peer review or mentor feedback at this stage can be invaluable.
Step 3. Transfer the information to Notion
I knew that Notion would be the most fun and practical way to present the diploma project. A good chunk of my projects and documentation were already inside Notion, so my next steps were to translate the requirements into Notion in a way that would be easy for me to follow.
I transferred this information into my Notion dashboard and began creating databases and templates to help me visualize the requirements, and map my existing projects and progress to those requirements.
Here’s what I did:
Created Toggle headers for requirements. I copied/pasted the completion criteria list into a simple toggle header so it tucks away neatly but its quickly accessible as needed.
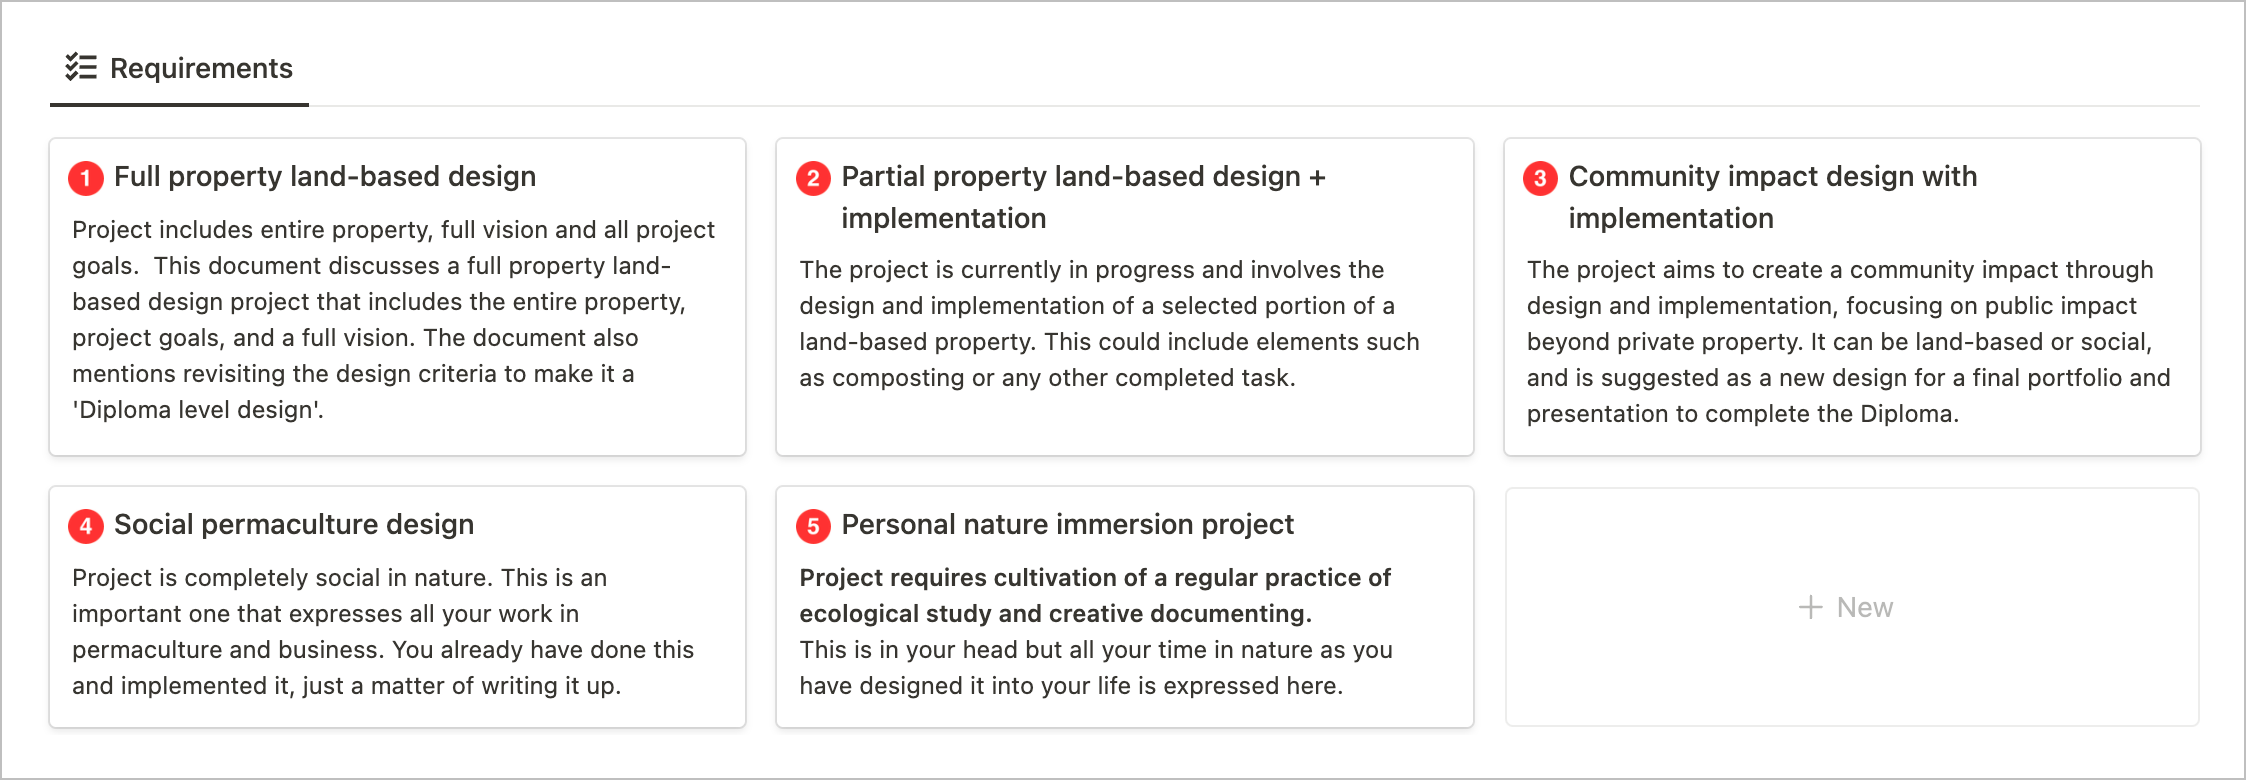
Created a Requirements/Criteria database. I added each required project type as a page in the database along with a description for quick reference:
Created a new Permaculture Projects database. I used a separate project database from my main workspace projects database so that this would have only essential database properties and would be easily shareable with outside parties. I then created a relation between the Permaculture Projects database and the Requirements/Criteria database to ensure that each requirement had at least one project, and each project fit at least one of the requirements.
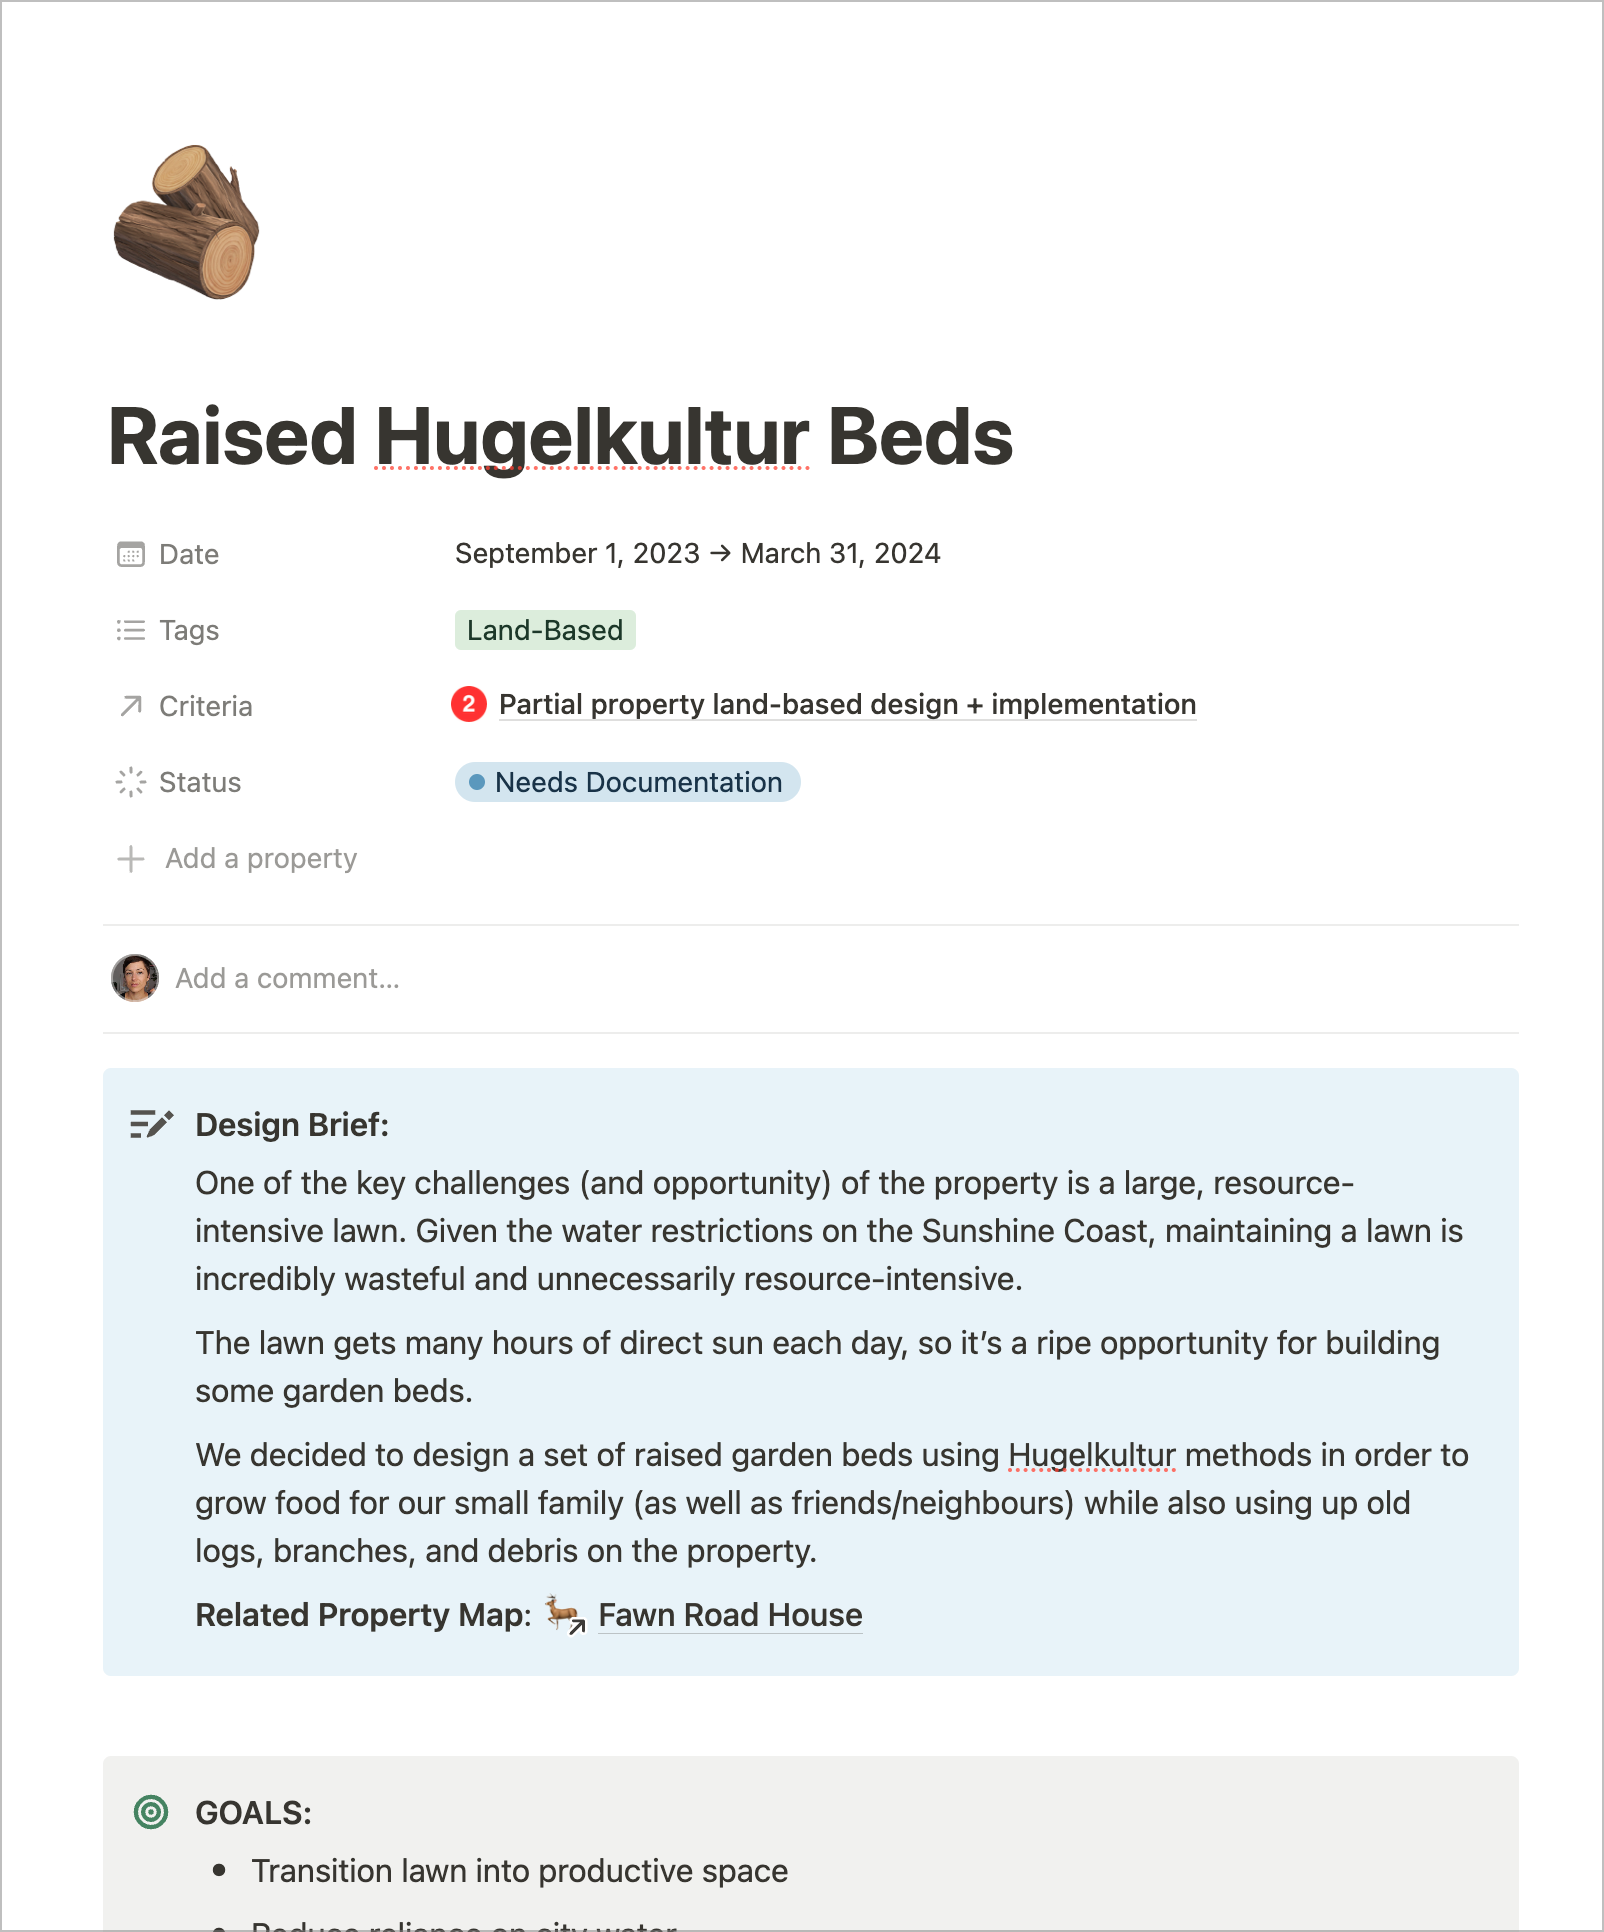
Create a Project Template. I created a super simple project template that contained all of the requirements needed to meet the project criteria in the body of the page. This way as I’m documenting each project the information is quickly/easily available at a glance without even needing to leave the project page.
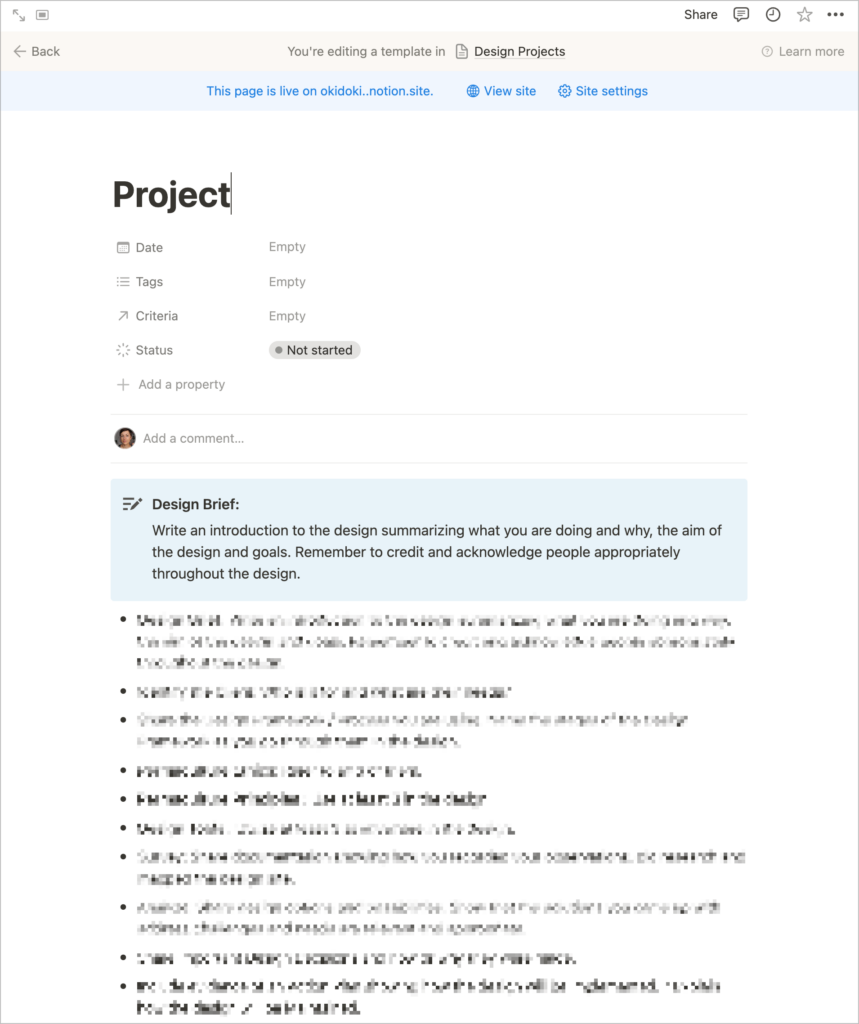
Create a shareable public page. In order to easily share my project progress with my mentor easily, I created a sharable Notion page that contains all of the databases mentioned above. This page will act as the final presentation format.
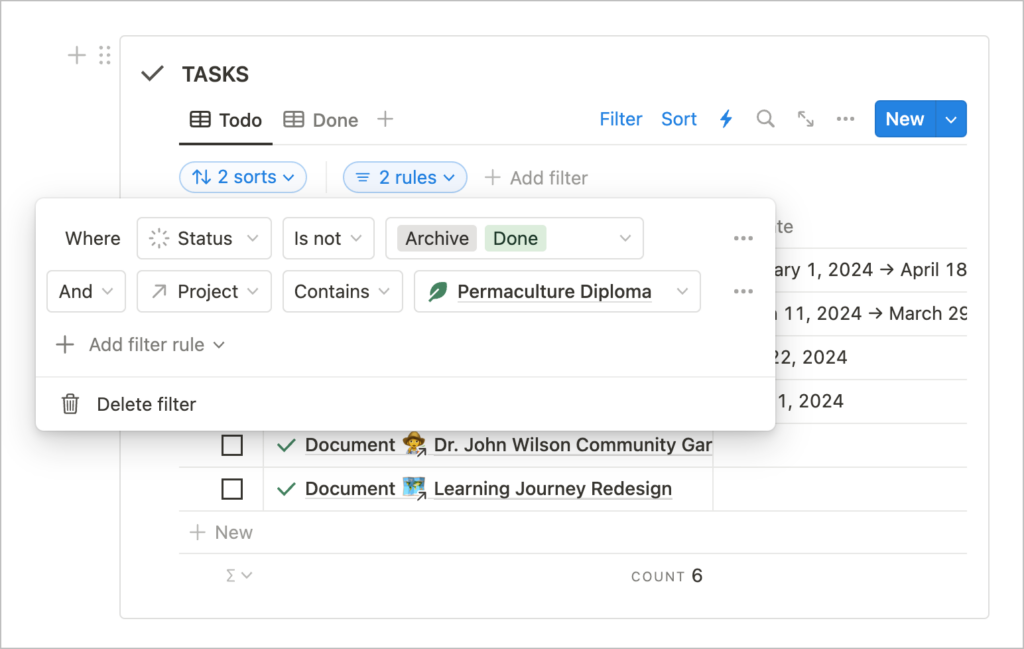
Create an action plan. Using my master Notion Actions database which has all of my day to day tasks, I created a linked actions database inside the dashboard for tasks associated with this project, then began assigning myself tasks and deadlines for each of the design projects.
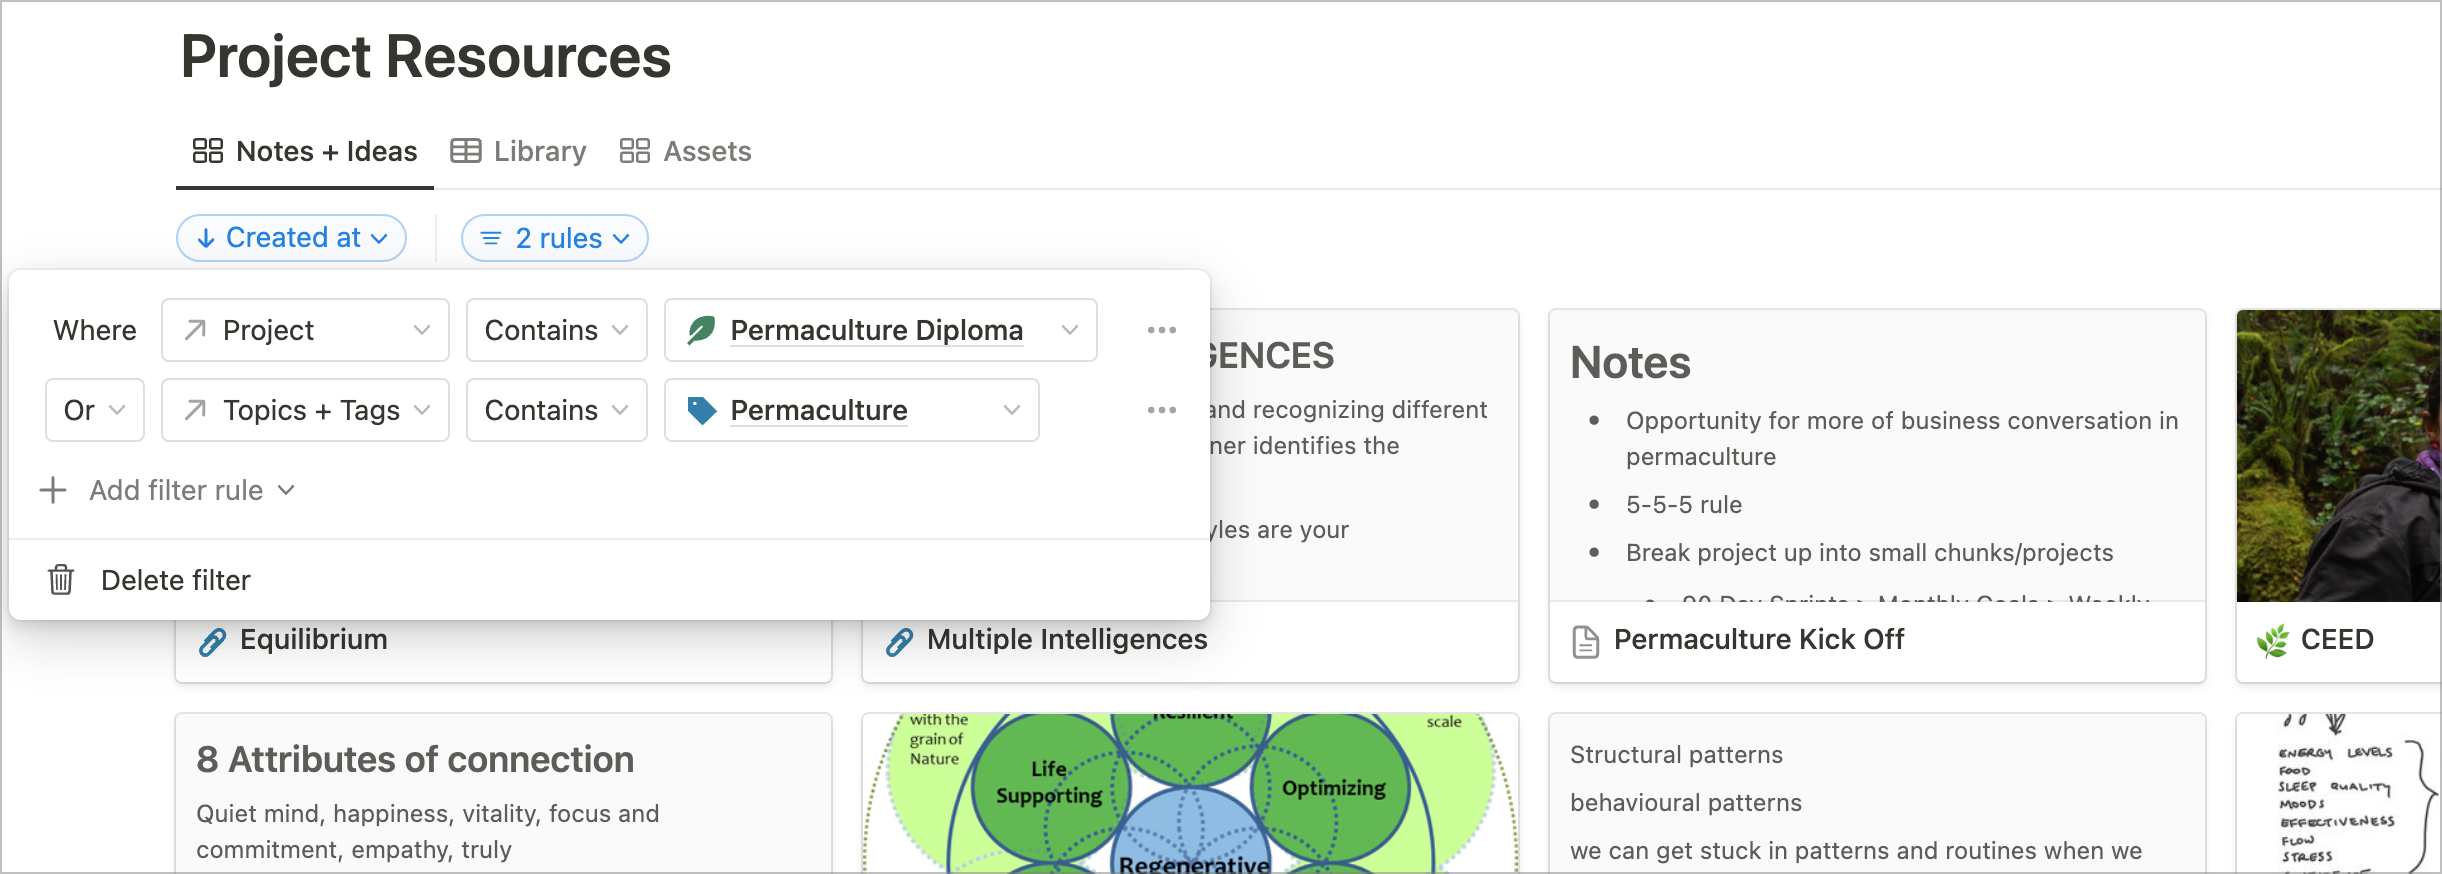
Lower on this dashboard page I also include linked views of all other relevant databases, including Permaculture principles, Permaculture ethics, and of course, my Notes + Ideas and Library databases, filtered to show anything relating to permaculture or my diploma project:
For some people, moving into action and understanding the project requirements might not have felt so complex, but for me, finding a more visual way to separate out different types of information was a huge and necessary unlock.
I was having trouble understanding the diploma itself as a project with its own requirements separate from the individual projects that make up the diploma, with each having their own criteria and expectations.
Then, seeing a sample project from my mentor was another huge unlock, as I had been majorly over-estimating what was required of me from a documentation perspective.
Once I better understood the requirements and could see them in a visual way in Notion, I became much more motivated to follow through on the project, because I could already see how my existing projects met the criteria, which created a sense of momentum (which is super important for ADHD’ers!)
While my diploma is not yet complete, having a visual Notion dashboard has been incredibly helpful for visualizing progress and helping me follow through; I’m consistently working on completing the documentation for the projects each week.
If you have a big intimidating learning project ahead of you, and you consider yourself more of a visual learner, consider how some of the strategies and approaches applied here might be helpful to you in your journey.
Do you have any interesting strategies for helping yourself follow through on big, challenging projects? I’d love to hear what’s working for you!

Leave a Reply